The Finished Studio Bathroom – Before & After
Y’all, the studio half bathroom is finally FINISHED!! Trudging through all of the finishing details took way longer than I thought it would, and I’m just so relieved that it’s finished.
It’s finished.
Can I just say that a few (hundred) more times? 😀 I love those words.
Okay, I’ll stop so that we can just get on with the pictures. Here’s how the studio half bathroom turned out…

But of course, before I show you more, I want to back up and take a look at just how far this area has come. When we bought the house, this area was just a storage room at the back of the garage. This is what the garage looked like before it was a studio. The door on the left leads into the breakfast room, and the doorway on the right was the storage room at the back of the garage.
Here’s what the actual storage room looked like. The roof sloped to the back of the house (i.e., the wall on the right), and the wall on that side was only about seven feet high.
And at one point, it housed this monstrosity of a furnace…

We actually used that furnace our first winter in this house, but it scared the heck out of me. About every third or fourth time it would come on, it would make this huge BOOM sound that was so loud it would vibrate the floor and walls of the house. The next winter, there was no way I was going to turn that thing back on, but we couldn’t afford a new HVAC yet, so we heated our house with space heaters. And it was a COLD and miserable winter. 😀
During the original phase of the garage-to-studio conversion, the studio was reframed with a beautiful high ceiling, but this back area still had to have this low ceiling. There was just nothing else that could be done with it at that time. Here’s the bathroom framed in, but still with the low ceiling…

But before we went any further with the studio, we decided to add a carport on the back (through the new French doors on the right in the picture above), and that changed everything! Since the new roof of the carport was built over the back part of the original garage/storage area roof, we were able to remove that original roof and expose the new taller ceiling in the back entry.
The bathroom (which is the door on the left in the picture above) doesn’t have the same high ceiling because we needed that space above the bathroom ceiling for air ducts, but at least the room now has an 8-foot ceiling all the way across. No more sloping ceiling.
So now let’s get to the details…
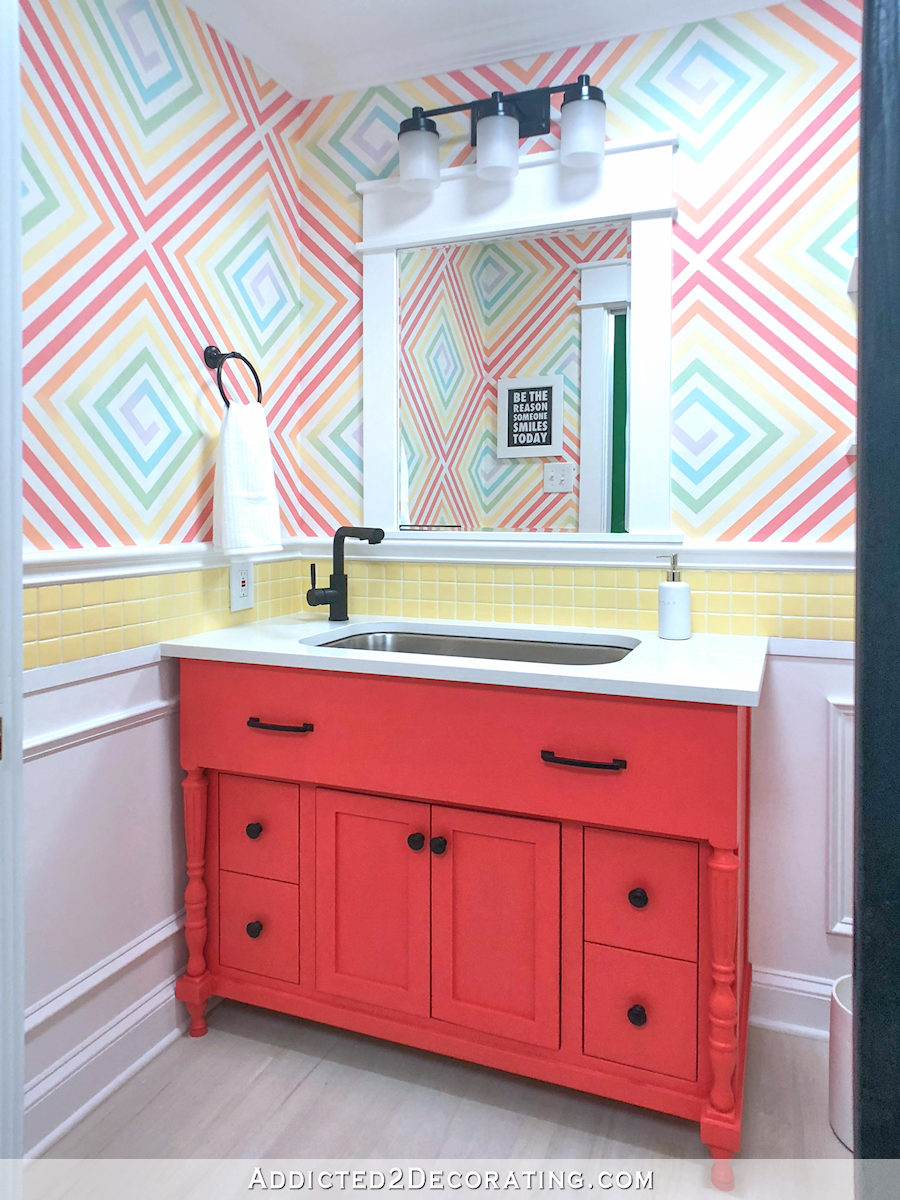
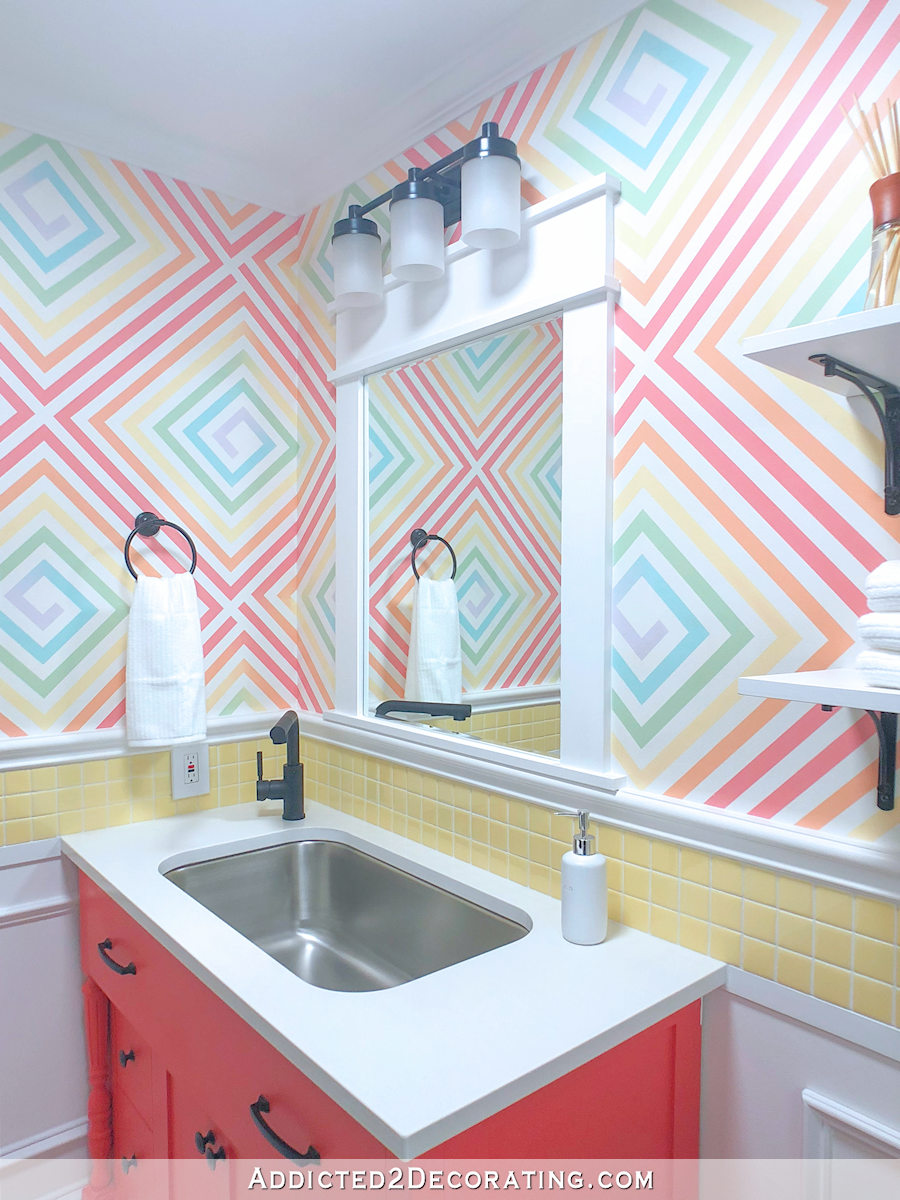
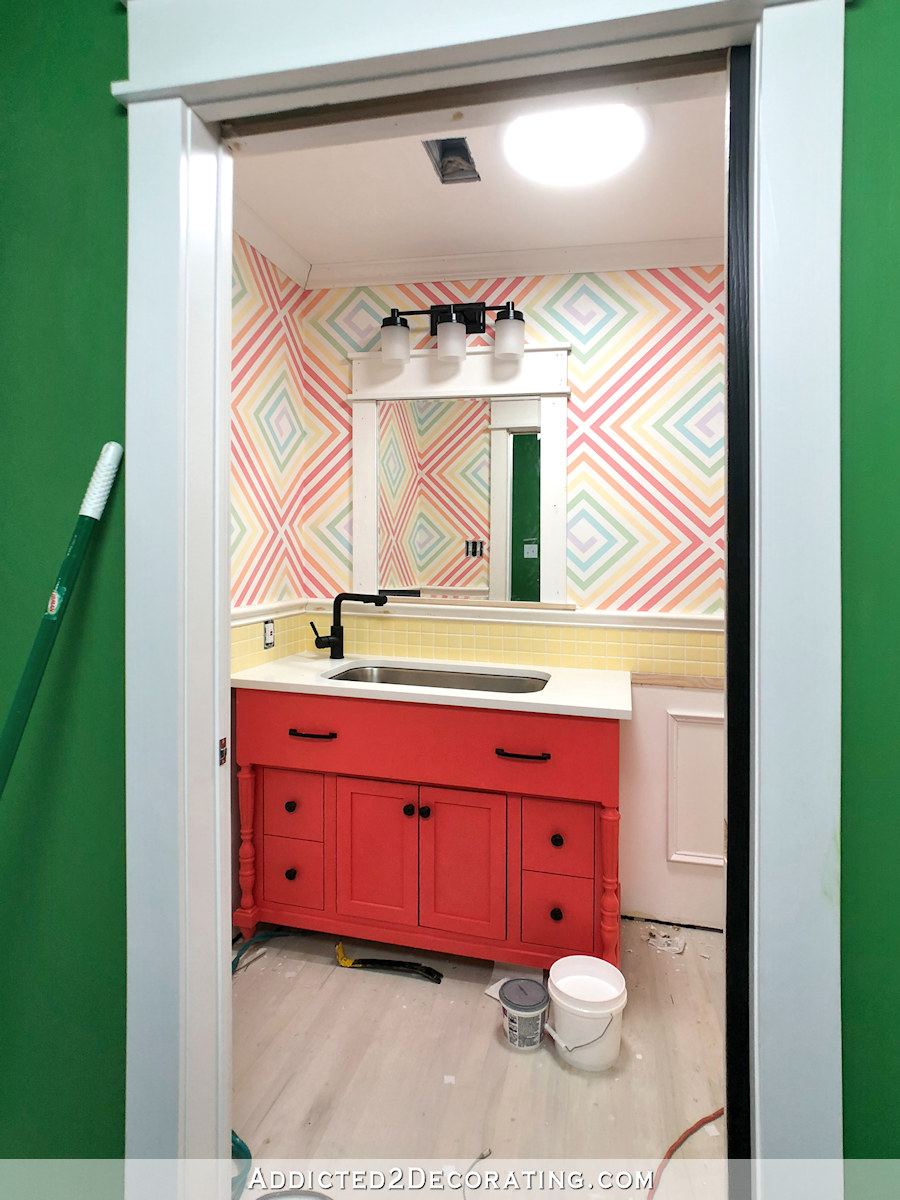
The mirror is a plain frameless mirror from Home Depot that I adhered to the wall with mirror mastic, and then framed in the exact same way I do my door and window casings…
Since this is a studio bathroom, and the sink will get a whole lot of use for things other than just washing hands, I decided to use a large, deep stainless steel kitchen sink instead of a regular bathroom sink. And a kitchen sink also requires a kitchen faucet, so this one has a pull out sprayer just like you’d find in a kitchen.
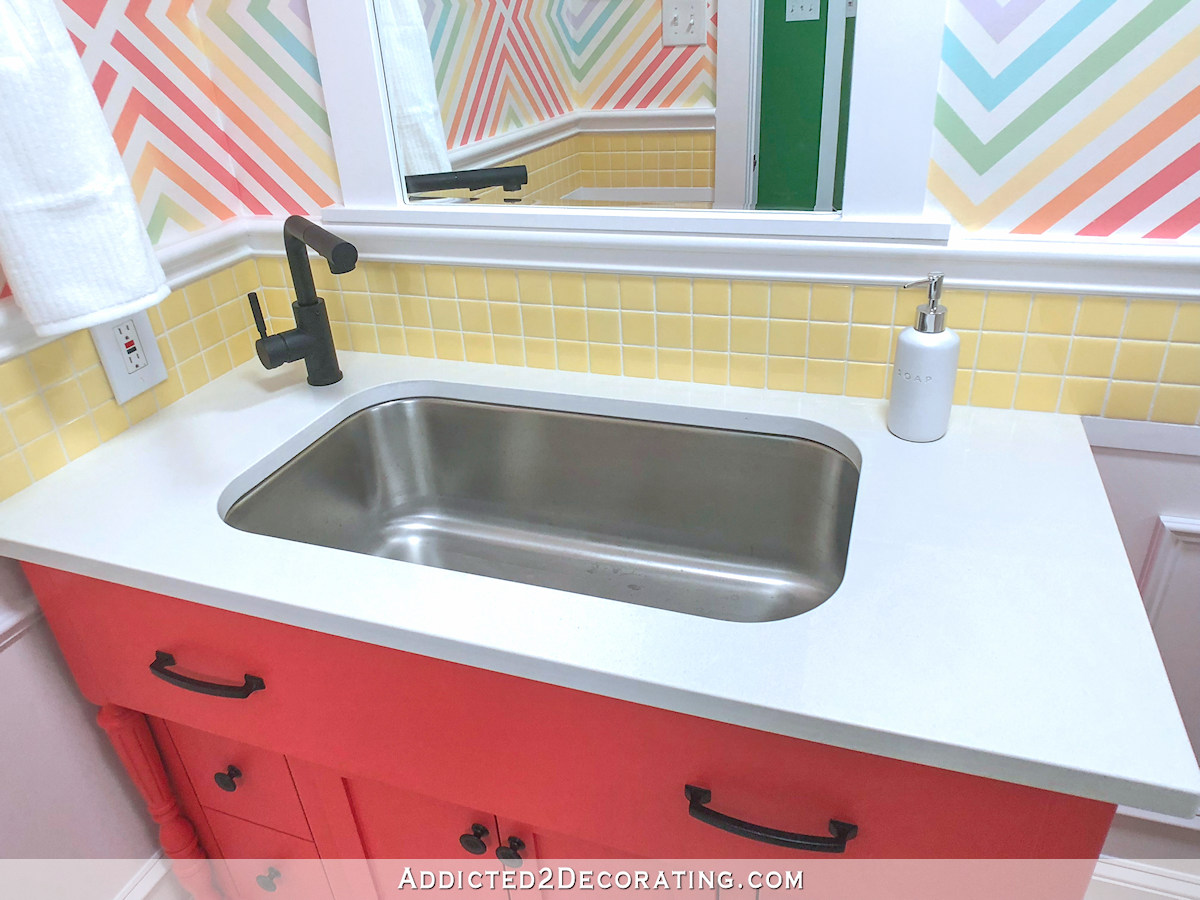
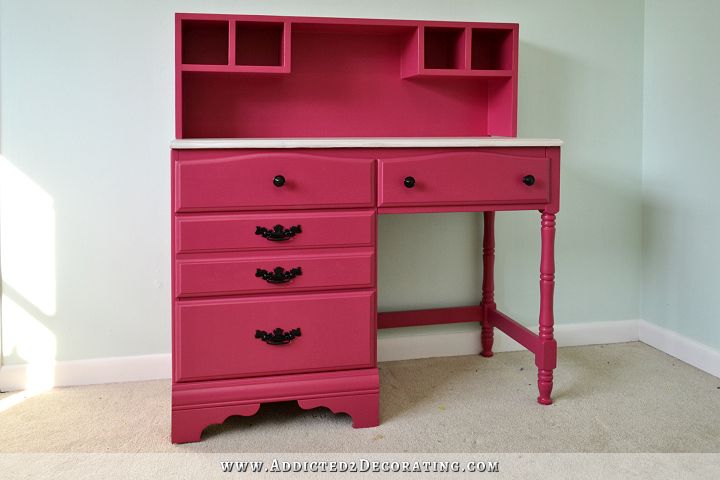
And because I used an extra large sink in a tiny bathroom, there was no way I could find a ready-made vanity to fit. So I built my own. You can find the details on the vanity build right here.
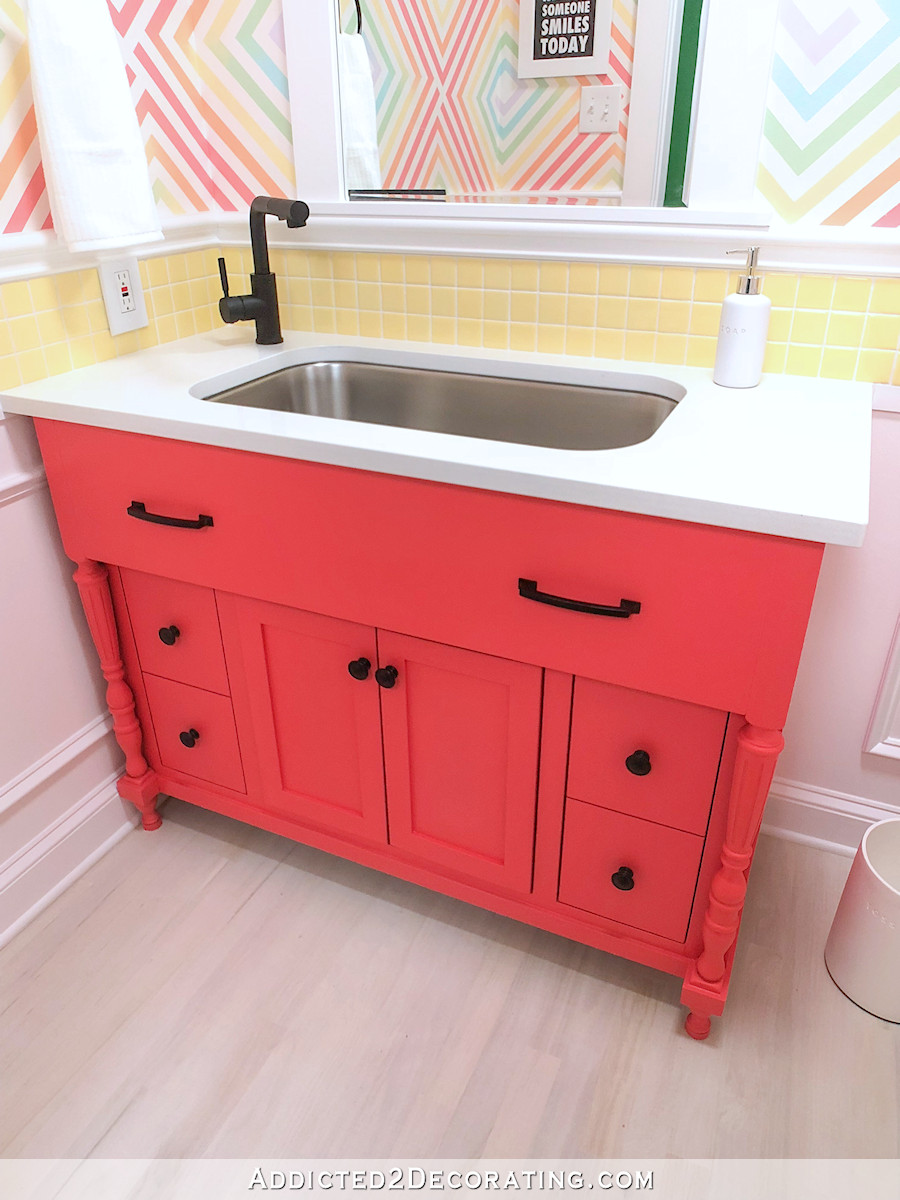
The countertop is quartz in the color Snow White, and the yellow tiles are ones that I made from plain white tiles, paint and resin to match the yellow in the wall design. You can see that tile project here.

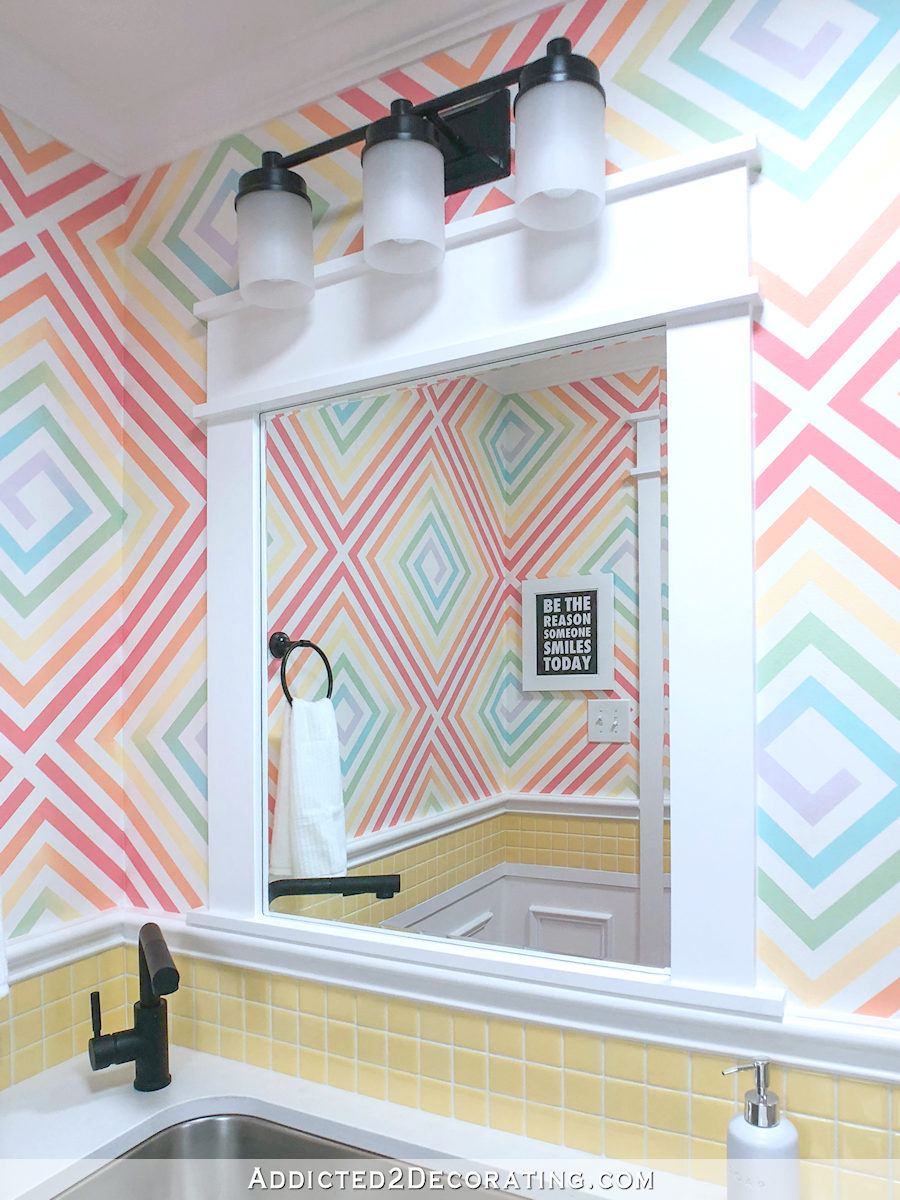
Above the light switch, I hung this framed typography art that I found on Etsy (find it here). It’s one of those that you download and print yourself, so I turned it into the negative image (black background and white lettering, whereas the original was the opposite), and I also had it printed backwards.

That way, from the back entry and while standing in front of the sink, you see the reverse image in the mirror, which shows the lettering the correct way…

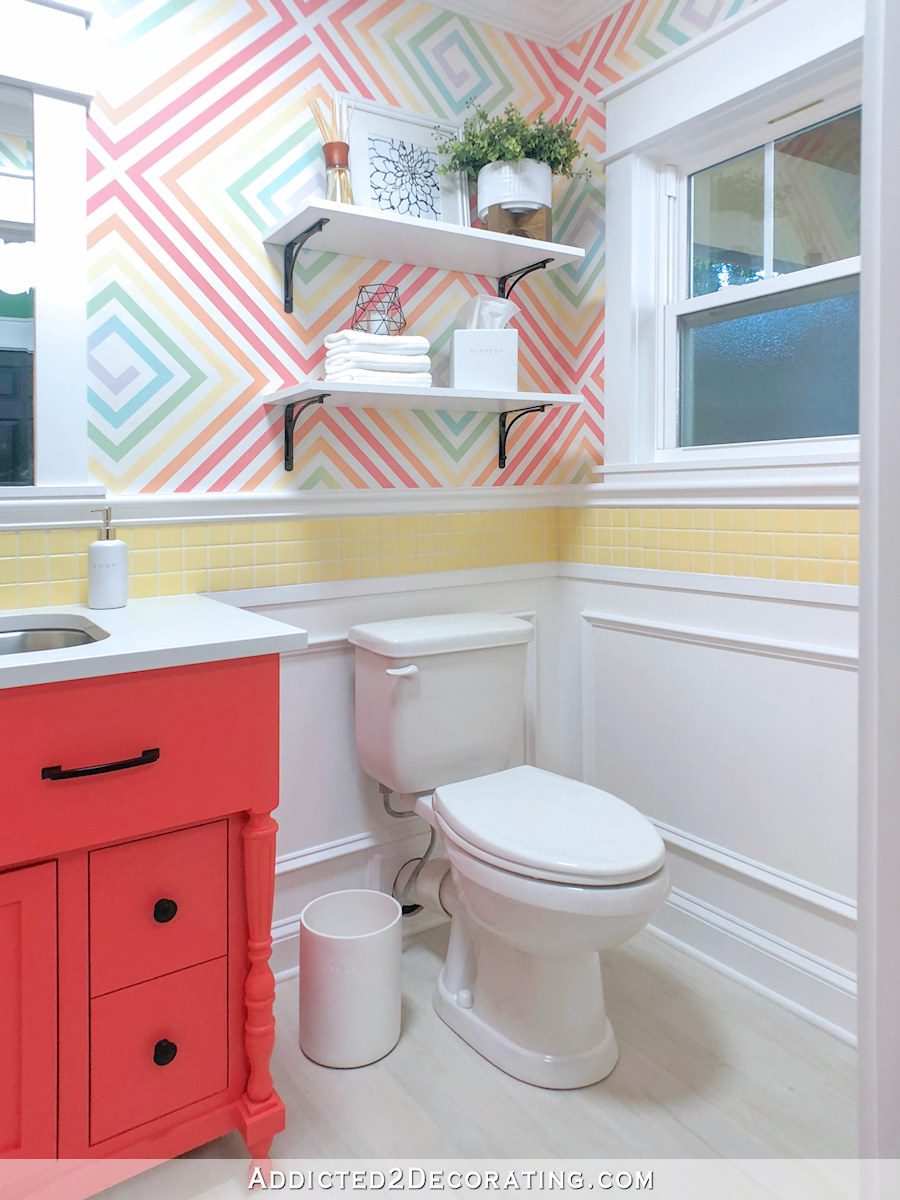
Above the toilet, I hung some very simple shelves using black brackets that I found at Home Depot and some 1″ x 10″ lumber cut to size and painted white.
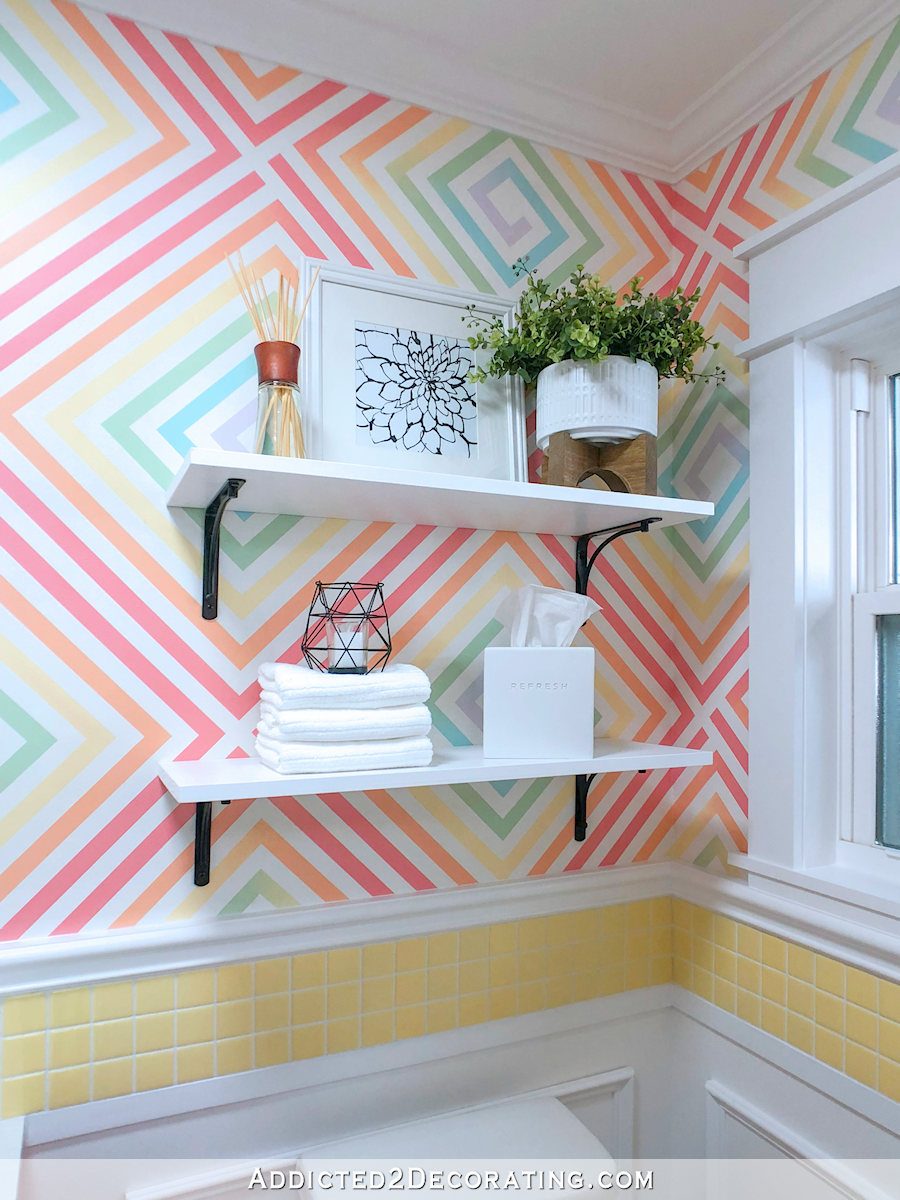
Then I added a few accessories — a planter from Marshall’s, a flower print from Etsy in a Michael’s frame, a reed diffuser from Bed, Bath & Beyond, a few hand towels, a votive holder from Pier 1, and a tissue box cover from Bed, Bath & Beyond.
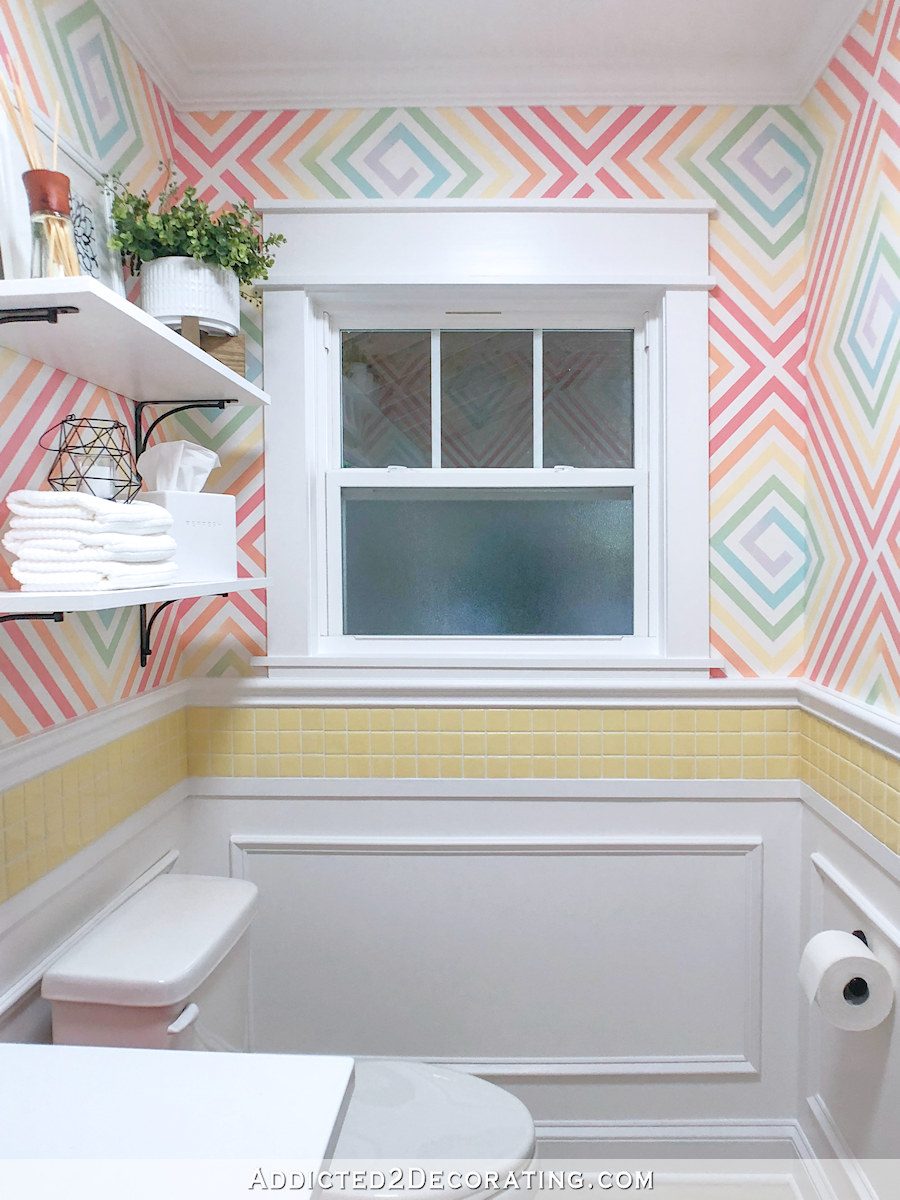
The toilet in this bathroom is a super fancy Saniflo system (even though it doesn’t look like anything special), and was most definitely the most expensive part of the room.
The neighboring room (the pantry is just on the other side of that wall) has a concrete slab foundation that already had new flooring, so that foundation couldn’t be jacked up to run new drain pipes for the sink and toilet. So instead, I had to get this fancy system that’s made for situations like this (and especially for putting kitchens and sinks in basements). Behind the wall sits a pump/grinder contraption (sorry for the visual) that literally grinds up everything that is flushed down the toilet and washed down the sink, and pumps it up through a pipe that goes into and across the attic and down the drain pipe in the hallway bathroom. That’s why it has that strange pipe going out the back of the toilet and into the wall. You can hook up to three things (sink + toilet + shower, or kitchen sink + prep sink + dishwasher) into one unit, so that you could add a full kitchen or full bathroom in a basement.
Anyway, it’s different, but it works! Every time the toilet is flushed, and every time I run water in the sink, I hear a motor start running behind the wall, and it stays on for about ten seconds and then goes off. At least I know it’s doing its job! 😀
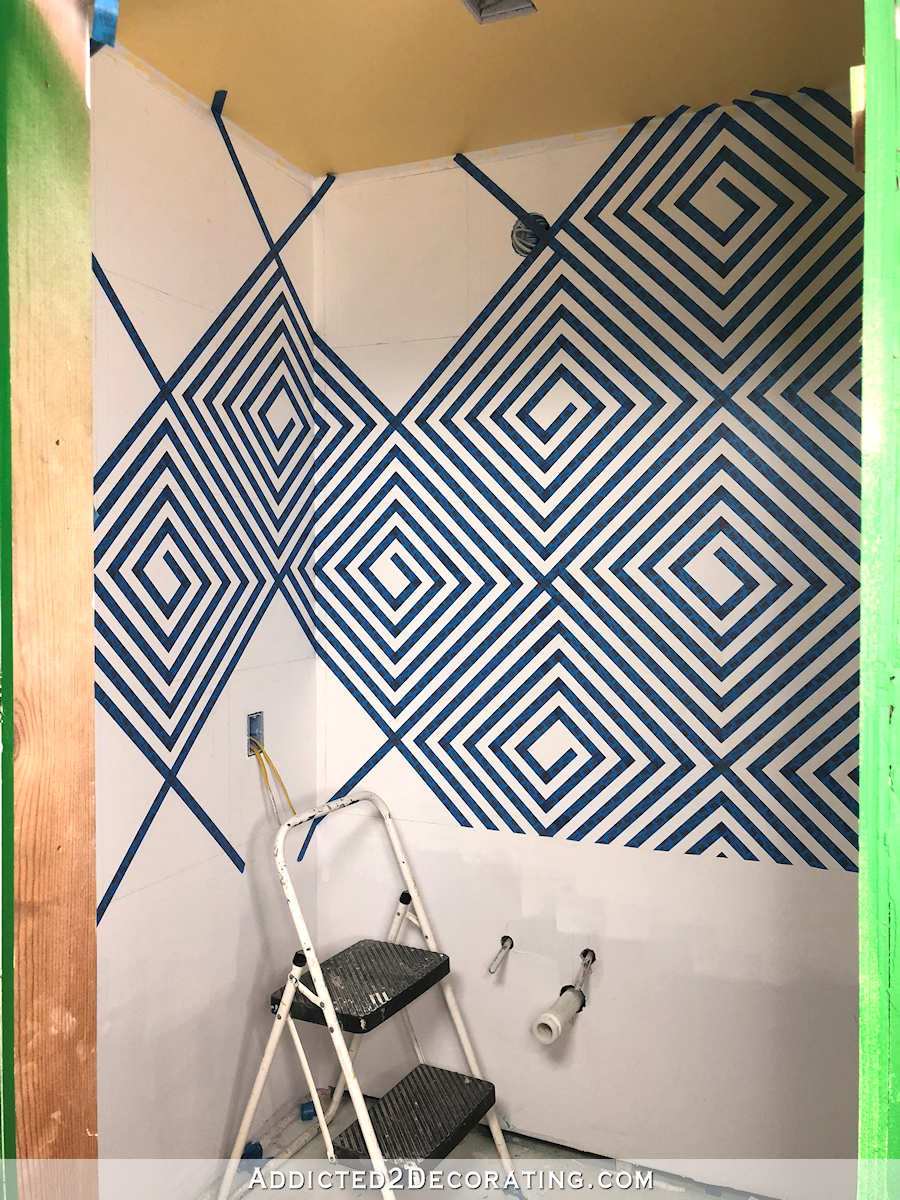
Of course, the star of the room is the wall design.
It’s crazy and colorful and fun…just what I wanted in a studio bathroom.

As much as I love color and pattern, I probably never would have had the courage to do anything like this in a bathroom in the main part of the house. So I’m very glad that I have this studio area that’s all mine that I get to play in and be a little crazy in.

And again, this is my studio area. While it is connected to the house, I don’t have any need for it to “match” the rest of the house. As long as what’s seen through the studio door from the kitchen and breakfast room isn’t crazy and clashing with the rest of the house, I feel like I can kind of let my hair down and go a little crazy with the rest. It’s mine. All mine. 😀 And I don’t need to ask for Matt’s input on any of it.
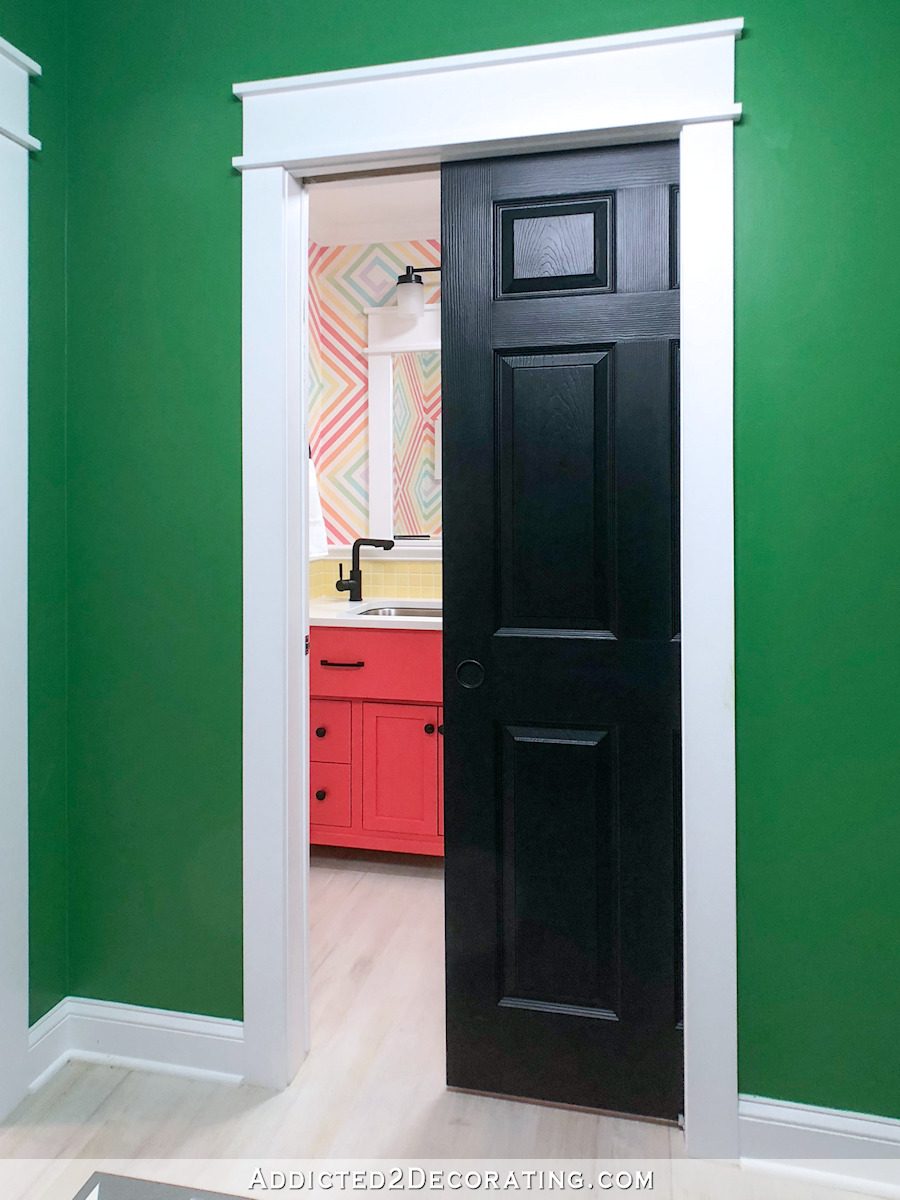
So with it separate from the rest of the house, and with it all mine and only mine, I decided to go a little crazy with a hand-painted design that took forever to finish. But it was fun! You can see a video tutorial here.

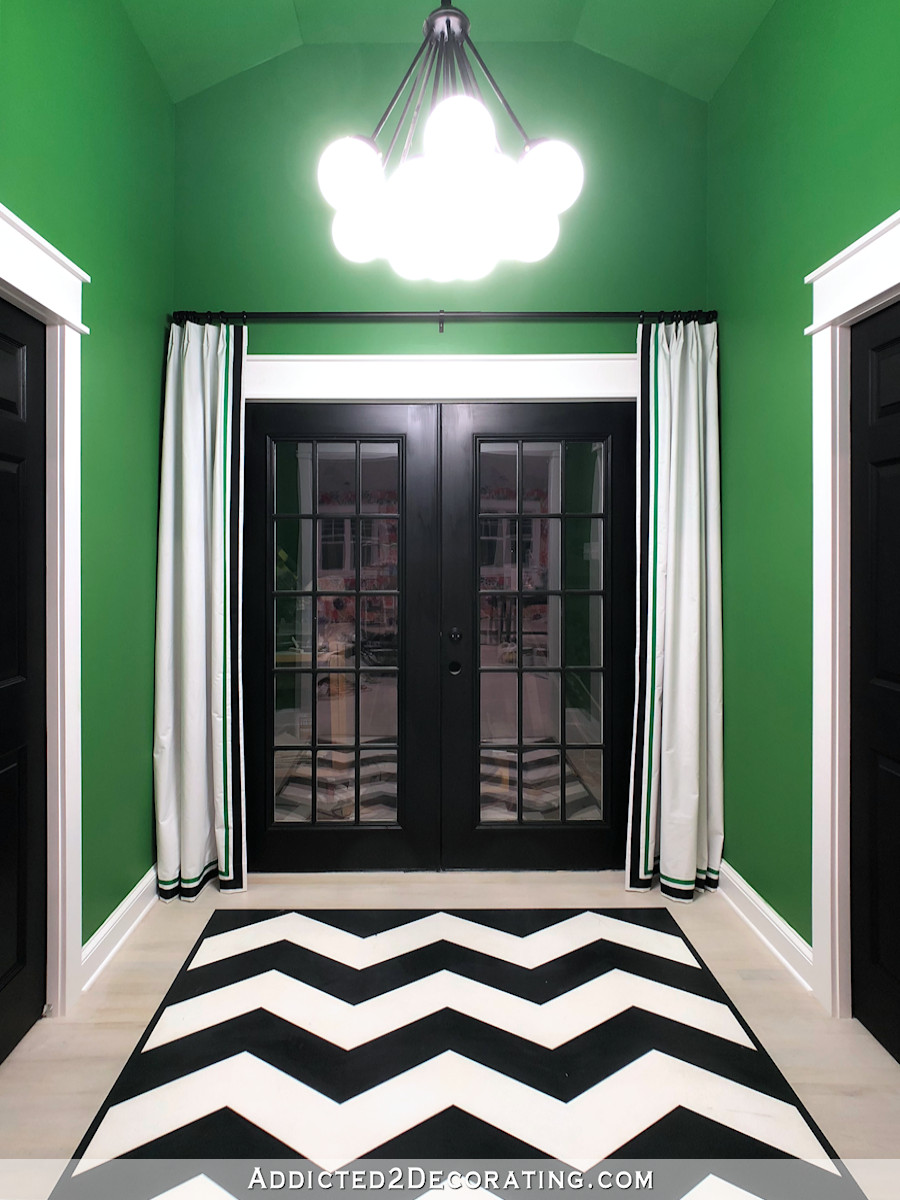
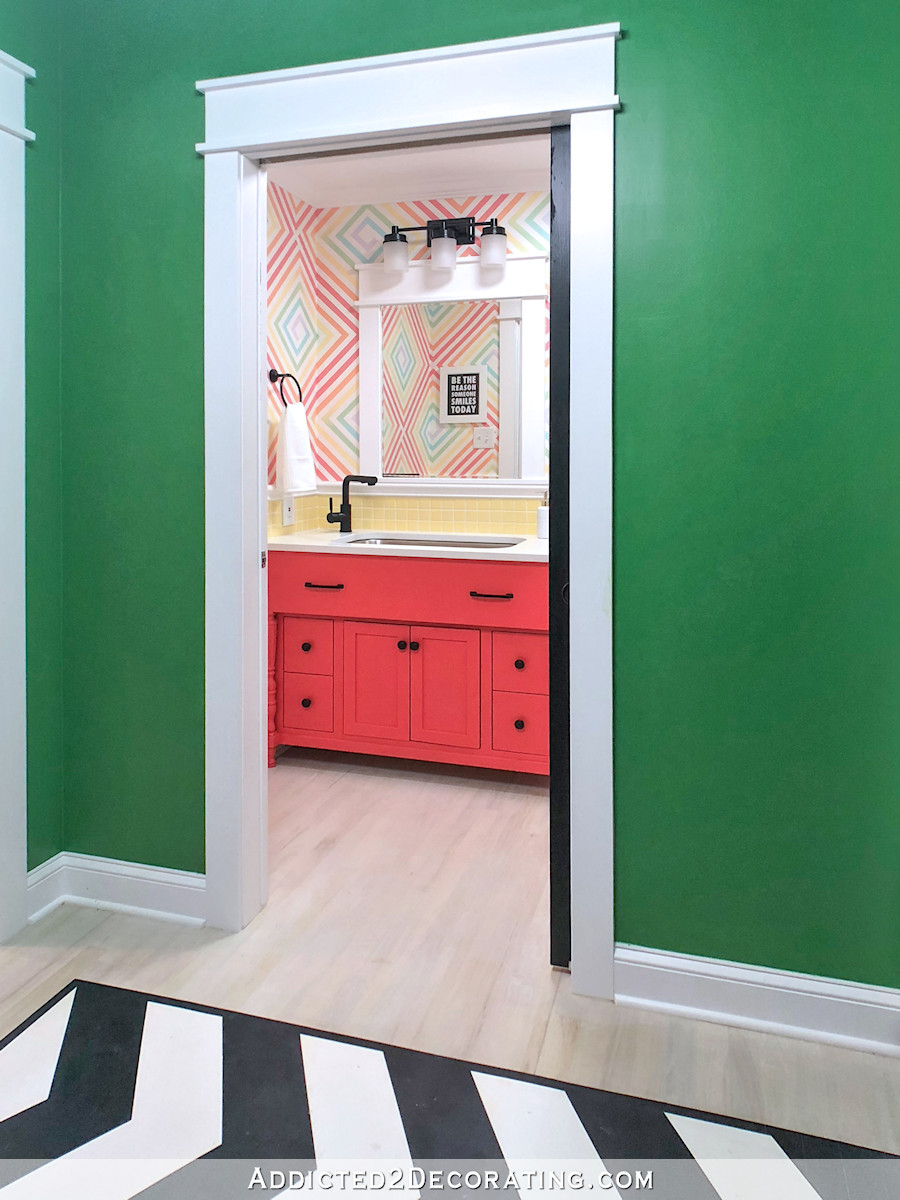
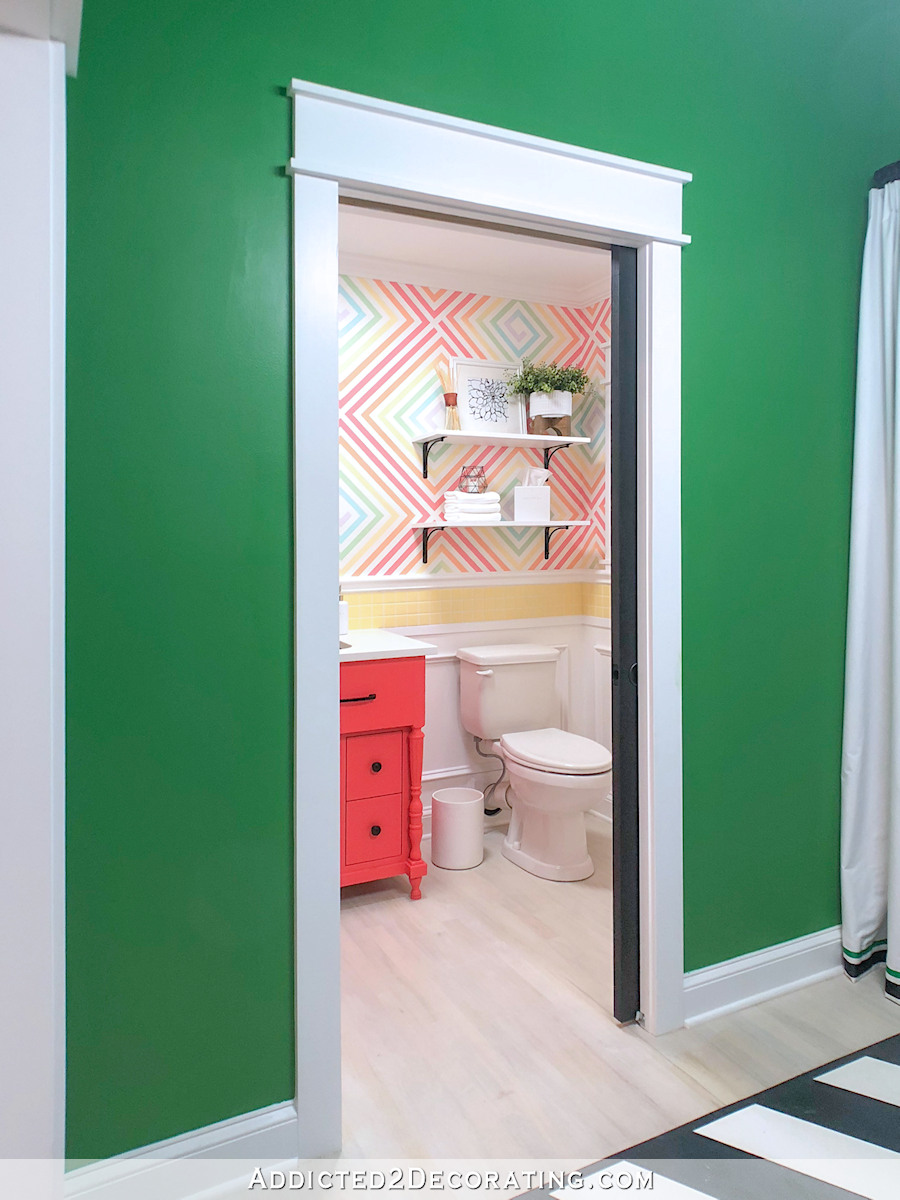
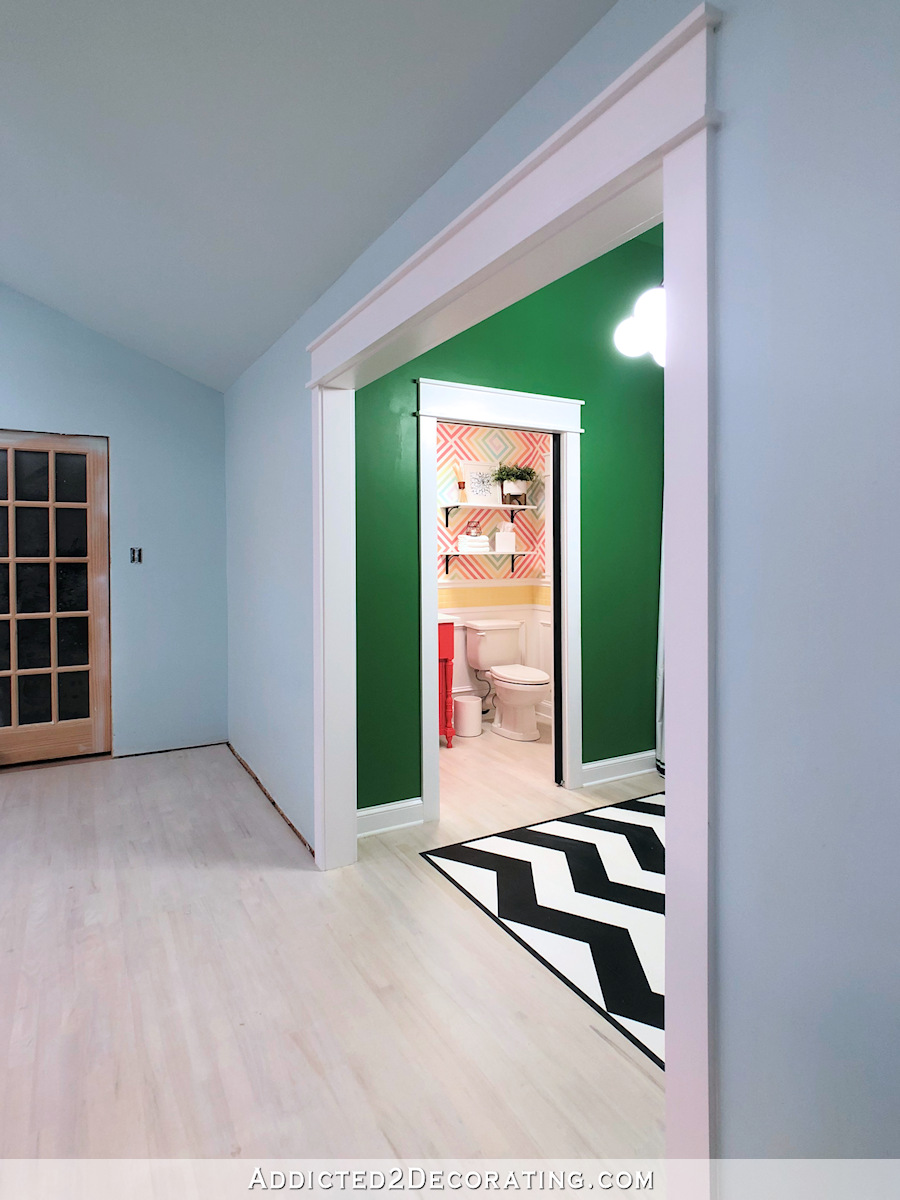
And I love the bright and bold surprise hiding behind the black pocket door in the back studio entry…
And that’s it! It’s done! From a dark, dirty storage area at the back of our garage…
To a bright, fun, crazy half bathroom at the back of my studio…

Resources:
(This list includes affiliate links.)
- Vanity: DIY – tutorial here
- Yellow backsplash tiles – DIY – tutorial here
- Black faucet – Amazon
- Stainless steel undermount sink – Amazon
- Vanity light – Home Depot
- Geometric “wallpaper” – DIY – tutorial here
- Ceiling light – Home Depot
- “Smile” typography art – Etsy
- Flower art – Etsy
- Soap dispenser, trash can and tissue holder – Bed, Bath & Beyond
- Shelf brackets – Home Depot
- Upflush toilet – Saniflo
- Countertop – Quartz, Snow White
- Vanity paint color – Roulette, Behr
- Wainscoting and trim color – Polar Bear – Behr
Update:
Want to see a video tour of the room, including a demonstration of how the grinder/pump works with the toilet and sink? You can find that here…


Addicted 2 Decorating is where I share my DIY and decorating journey as I remodel and decorate the 1948 fixer upper that my husband, Matt, and I bought in 2013. Matt has M.S. and is unable to do physical work, so I do the majority of the work on the house by myself. You can learn more about me here.
Love, love. Lots of work and projects getting there, but just super!
No words! Just WOW!
It’s just so pretty! I love how creative you are and that you follow your own creative spirit! So refreshing!
I agree!
Amazing as always, Kristi!! 😁
Looks wonderful. You never disappoint us. Your work is always unique, fresh and full of happy color.
IT’S INCREDIBLY SMASHINGLY BEAUTIFUL!
Perfect! Congrats on the finish! Love it all. Keep up the great work.
Gorgeous! Love it.
WONDERFUL AND FUN! So happy for you! Another room completed! And you get to mark things off your list! Congratulations!
Sheila F.
You F.I.N.I.S.H.E.D!!!
Team A2D is PROUD of you! Great job. It is so breathtaking Kristi.
Congratulations on this accomplishment!
Kitchen, dining room, 2 bathrooms, hallway, and a pantry–all DONE?!?
YOU are on a roll.
I absolutely love it! And I love the juxtaposition of the elegance of that entryway, and the glorious fun behind the door. I am enjoying your journey in this house, even the stop and starts, the re-do’s. I have learned so much from you, especially about not being afraid to try something. Oh, and I love the looking in the mirror and seeing the wee sign perfectly printed. It would make me smile every time!!!!
So much fun! What’s next? Living room? Studio? Both?
I’d like to build my second studio work table, then make the pink draperies for my living room, and then maybe work in a couple of outdoor projects before starting on my studio cabinets.
Congrats! Beautiful room, love all of!
Wow!!!! LOVE the bathroom. You did an awesome job on (as usual)!!!
Applause! Applause! Applause! Applause!👏
Looks great! And can I just say that sign is perfect for opposite a toilet? :laugh:
This room is spectacular and that sign did make me smile. Very clever.
My favorite detail!!
Actually, this might be my favorite thing about the bathroom. So unexpected and I would have to smile every time I saw it 🤗
This is wonderful!!!!
Congratulations 🎉 I am so happy for you that it is done done. It is fun and colorful and very you. It turned out wonderful! Take the weekend to regroup and decide what is most important to you for your living room and get started towards that goal. For me, I am hoping for reupholstered chairs and then pink drapes. But whatever order you tackle things I am looking forward to the process 😊
Looks fantastic! Well done. Xx
As with everything else you do, you’ve done an amazing job down to the very last detail! ALOT of work went into this one! It’s so creative, fun and colorful… just what you needed for your studio bathroom! 🙂 Great job!
Kristi, it is just beautiful and so much fun. I have to tell you that the man who owns the paint store here in Macas, Ecuador, likes to see what you accomplish. So from time to time I stop by and show him pictures of your projects. He has a talent for hand-mixing custom paint colors so he takes note of what you do.
My son has begun teaching him English. (The fellow is going to visit the U.S. in a few months so he wants to be able to communicate at least a little.) I got to thinking that in time he will be able to access your blog on his own after he learns more English. I am sure he will spend hours viewing it.
I love that! I hope he will read it!
It looks so colorful and fun! Yes. A bathroom can be fun. tee hee I love that the door, window and mirror trim are all the same. Very clean. The tiles are the excellent accent to those colorful walls. I love it and you should be so proud of yourself for such a cute bathroom that will be a great accent to your studio. Onward and upward…
This is the most awesome half bathroom I have ever seen!!! Super job, Kristi!
Congratulations! You really made everything beautiful! I’m sure it’s all even more striking in person than photographs (I had to go to Home Depot to get a paint card of the vanity color🙈) and even the photos show a delightful color filled room. And your discipline to finish all the little cosmetics that aren’t necessarily functional but say FINISHED- is most impressive! 👏👏👏
Hooray! I love the idea of printing text in reverse so it shows correctly in the mirror. I hoped that was how you did it, but until you got to that part of the post, I confess I was really bothered by the possibility that you’d photoshopped it! Enjoy the fruits of your hard labor; it’s terrific!
It’s all in the details. Love the reversed sign to read in the mirror. I did love your green glass light though. Hope he finds a great home.
So great. Thanks for taking us along on this journey!
The before and after leave me speechless!!!!! B R A V O!!!!!!!!
Perfection!
Excellent! It’s so fun.
Super love it! You are literally building a whole new house and decorating it amazingly, to boot! Love!
Just out of curiosity….are you left handed? The faucet seems backward. Everything is gorgeous.
I’m right handed, but the faucet is backwards. I had it turned the other way, with the handle on the right side. But I kind of had to reach around the stream of water in order to turn it off, and if felt really awkward. So I’d rather have a more direct reach to turn it off without having to reach around the stream of water, even if that means turning it on and off with my left hand.
Thank you for the reply. Your attention to even the smallest detail is amazing.
Ah, so happy for you! And, what a beautiful job – top to bottom gorgeous – and colorful and fun. Congratulations on a the finished project! Enjoy.
So, so pretty! You must be feeling a great sense of accomplishment and rightly so. I have to admit that I too, noticed the lettering in the first pic and thought, what the heck? Reverse lettering didn’t even dawn on me. LOL Great job!
There’s no way I could go into this bathroom and not be happy.
LOVE it! You are amazing 🙂
Oh, it is beautiful. You did a wonderful job. I am so glad that monkey is off your back. On to the fun stuff!
Standing ovation!
absolutely gorgeous! I think you should do this professionally and have a couple of lackeys to do the grunge work. Then I could hire you to make my house that lovely. (outrageous dream, I know)
Ah yes! Absolutely gorgeous! I don’t think it’s crazy at all! I think it’s beautiful, fun, exciting, and whimsical!! Great job!! You go girl!!
Stealing your reversed text idea! It all looks amazing and fresh and fun!
I LOVE IT!!!! I’ve really liked everything you’ve done but THIS!!!! WOW!
I would never have the patience to do those walls but they are fantastic & SO fun.
YOU ROCK!!!!!
I love the touch of black with the shelf brackets. Perfection.
This is fabulous! I love the finished room, every design element! Congratulations for completing this project!
Love the bathroom! How far apart did you hang the 2 shelves?
I think the space between them is about 12 inches.
It’s absolutely stunning Kristi! Love, love. love it!
I love it!! It turned out beautifully and is so fun. Way to go! I know you said that this is bathroom is all yours so it doesn’t matter if Matt likes it, but does he? At least like it because you like it and it’s all yours. 🙂
He does like it! He called it “a happy space.” But it’s also not something that he’s want in the main part of the house, and I wouldn’t, either. He thinks it’s great for my studio, though! 🙂
I’d love more input on the mascerating toilet. We are going to do the same in our basement but I wondered about access to the pump if anything goes wrong. Can you get to the pump? Why did you choose this vs. the one with the pump under the actual toilet tank?
LOVE the reverse lettering sign.
I didn’t know anything about these toilets, so I just trusted the word of my contractor. Actually, it was his plumber who told me about them and recommended this one. The pump is behind the wall. The panel behind the toilet is removable (that the reason I went with picture frame molding so that I could disguise the removable panel), and the toilet just pulls away from that pipe. There’s nothing complicated holding it in place except for the two huge screws that go into the floor to keep the toilet from moving. So getting to the pump to do any maintenance would be very easy.
It’s PERFECT. I love it. So glad it’s a huge item off your never-ending list. Get yourself and Matt some nice champagne, and do a really big toast to yourself!
You F.I.N.I.S.H.E.D!!!
Team A2D is PROUD of you! Great job. It is so breathtaking Kristi.
Congratulations on this accomplishment!
Kitchen, dining room, 2 bathrooms, hallway, and a pantry–all DONE?!?
YOU are on a roll.
AND the front entrance! Fantastic!!
I don’t comment often. You are such an inspiration!!! I am so impressed with everything you do. I love how you use color, you have a very thoughtful approach and it is so visually pleasing. I am so tired of the “griege” look everyone seems to love……it is too safe and boring.
I love how you used just the right amount of black in there in just the right places. It makes sense next to the hallway that way and grounds everything! 🙂
Love this take on a ‘traditional’ style half bath with untraditional colors and wall design. Every feature is unique and has your own personal style expressed with confidence and panache. Well DONE!
Congratulations!!! You have poured so much effort into this space (as you do with everything you show us), and I’m celebrating with you! 🙂 I also LOVE the creative twist on the typography art that reflects in the mirror – so clever! I hope you also feel amazing for having completed yet another aspect of your home!
Love it … it’s fabulous!!
It looks so good. And just wondering what is in the space to the right of the entryway across from the half bath? Is it a storage room?
Yep, that’s a storage room. 🙂
Give your fine self a pat on the back, because now we all want one, too! Fabulous!
It’s stunning! The way everything now fit together in terms of colour and look is pure Kristi! I love the black accents, they tone down everything a bit and ground the colours – fabulous. And the picture in the mirror is such a fantastic idea and makes me, and apparently everybody, smile 🙂 Congratulations!!!
Perfection!
Yippee! What a fun room! I know you are thrilled to be finished with this one. My favorite thing has to be the vanity. I LOVE the color you chose. The design on the walls – not what I would want, but I love it for YOU, and that you are willing to go with a vision and carry it through despite the labor involved. It all together gives me a happy vibe and I DO love it as a whole! Now you are on to the living room and I can’t wait to see! You have me thinking about painting my bedroom in a pale pink, and getting away from basic neutral for a change. It would still be basic, but a change for me and something I know hubs will fuss about! LOL!
I love it. The black accent accessories are a wonderful addition to the beautiful colors, and the fact that you printed the word art backwards became reason I smiled today.
I love it! The way you pulled it altogether is amazing. It is fun, creative, and makes you happy just to look at it! Girlfriend, you out did yourself!!
What brand and color is that black paint?
I use Behr Premium Plus, and I just go to the paint desk and ask them to mix solid black.
Looooove it!!!! You did great Kristi!
OMG!! I absolutely LOVE it!!! YES!
This little bathroom just turned out amazing and puts a smile on my face when I see it!! You should really be patting yourself on the back for everything in here from tiles to moulding, you did it all, and I find that really beyond the pale! I’be been thinking about doing something like the “floor rug” you painted in the entryway but making it a zebra print instead of chevron. I think a stencil could be created for the image or maybe just freehand the outline.
It’s so colorful and vibrant. How long did it take to finish redecorating it, if I may ask? Lovely job, by the way.