How To Make Lined Pinch-Pleat Curtains, Part 1
Today, I finally get to show y’all how to make lined, pinch-pleat curtains since I’m so close to having the first of the two curtain panels finished for the back entry of the studio. These curtains are single width (i.e., one single width of fabric each), and they’re meant to be decorative only. Single width curtain panels can work as operative curtains to cover a window for privacy and light control as long as your window is pretty narrow. But for my purposes, they’re decorative only.
This tutorial (Part 1 below and Part 2 in the next post) has over 100 photos, and is shown in 15 different steps. Part 1 (this post) shows steps 1 through 6. Part 2 (the next post) shows steps 7 through 17. Here’s a quick overview of the steps, with links directly to that step of the tutorial…
How To Make Lined, Pinch-Pleated Curtains
- Step 1 – Install the curtain rod and rings
- Step 2 – Take measurements for curtains
- Step 3 – Prepare curtain fabric
- Step 4 – Hem the curtain fabric
- Step 5 – Prepare and hem drapery lining
- Step 6 – Attach lining to the curtain fabric
- Step 7 – Measure and mark finished curtain length
- Step 8 – Trim off excess drapery lining
- Step 9 – Create header with header tape
- Step 10 – Measure and pin pleats
- Step 11 – Sew in pleats
- Step 12 – Hand sew the final details
- Step 13 – Attach drapery pins and hang the curtain panel
- Step 14 – “Train” the curtain panel (optional)
Now that you have an overview of the steps, let’s get to the details. Here we go!
1. Install curtain rod and rings.
First, I install my curtain rod and rings. I used to do this after the curtain panels were made and ready to be hung, but I’ve found that it’s so much easier to install the rod first, and then make the curtains to fit the height of the installed curtain rod.
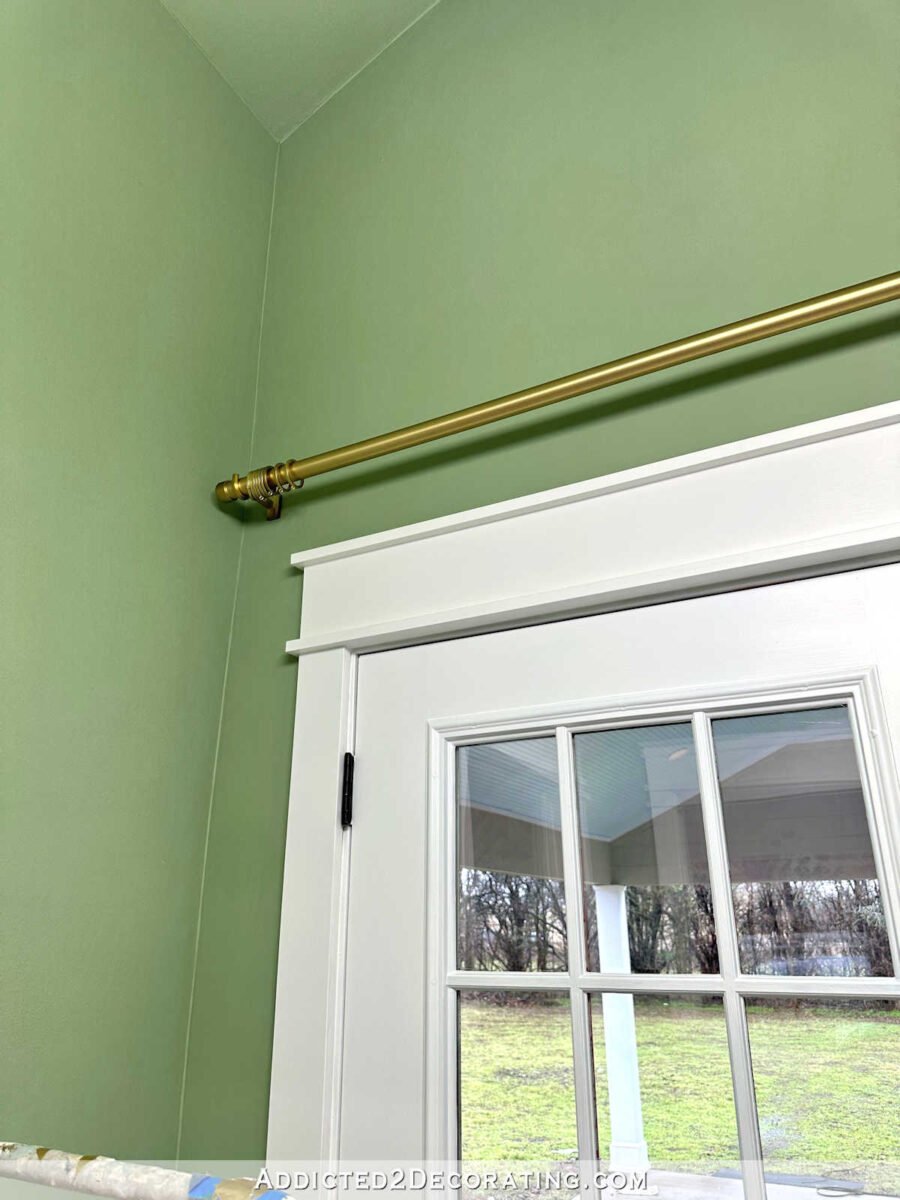
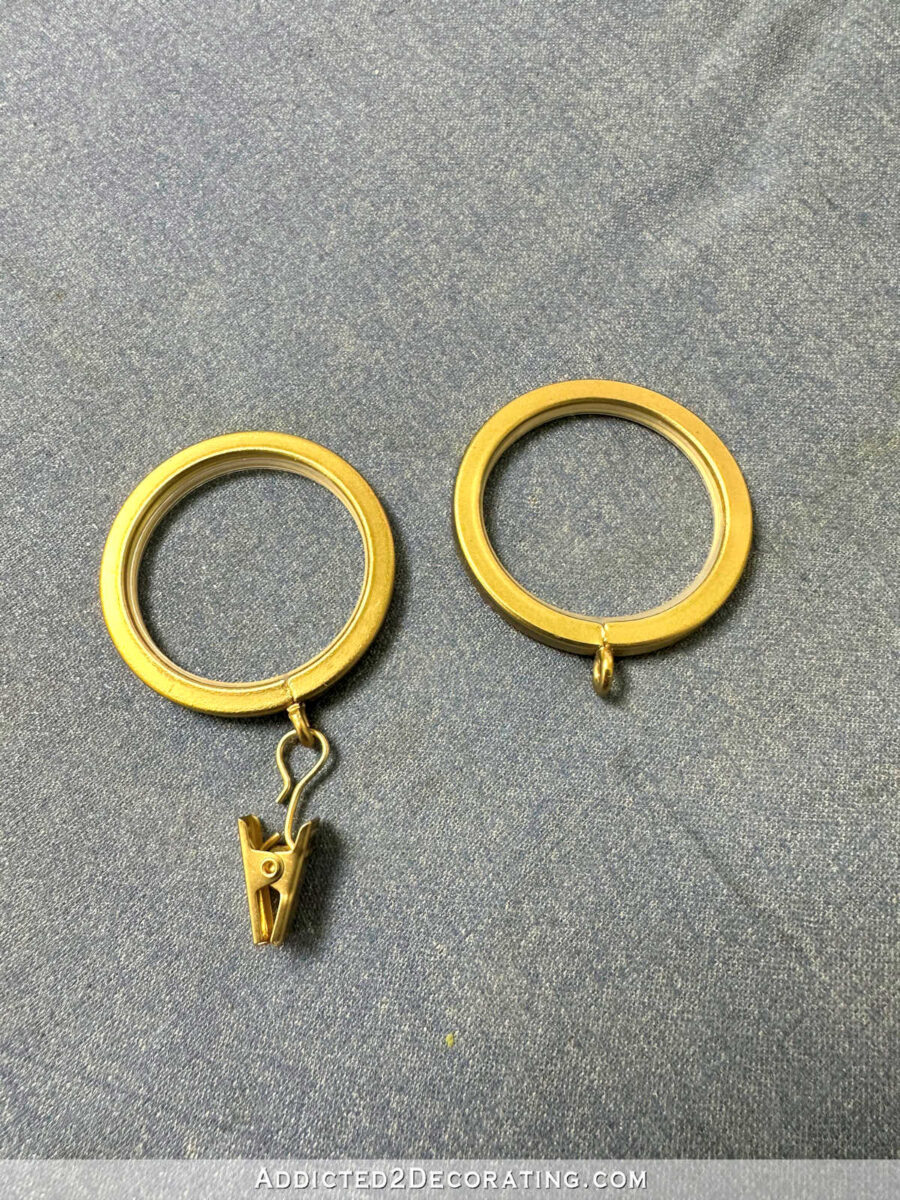
I also go ahead and add the rings, but I remove the clips first. No properly made curtain panels should ever be hung using clips.
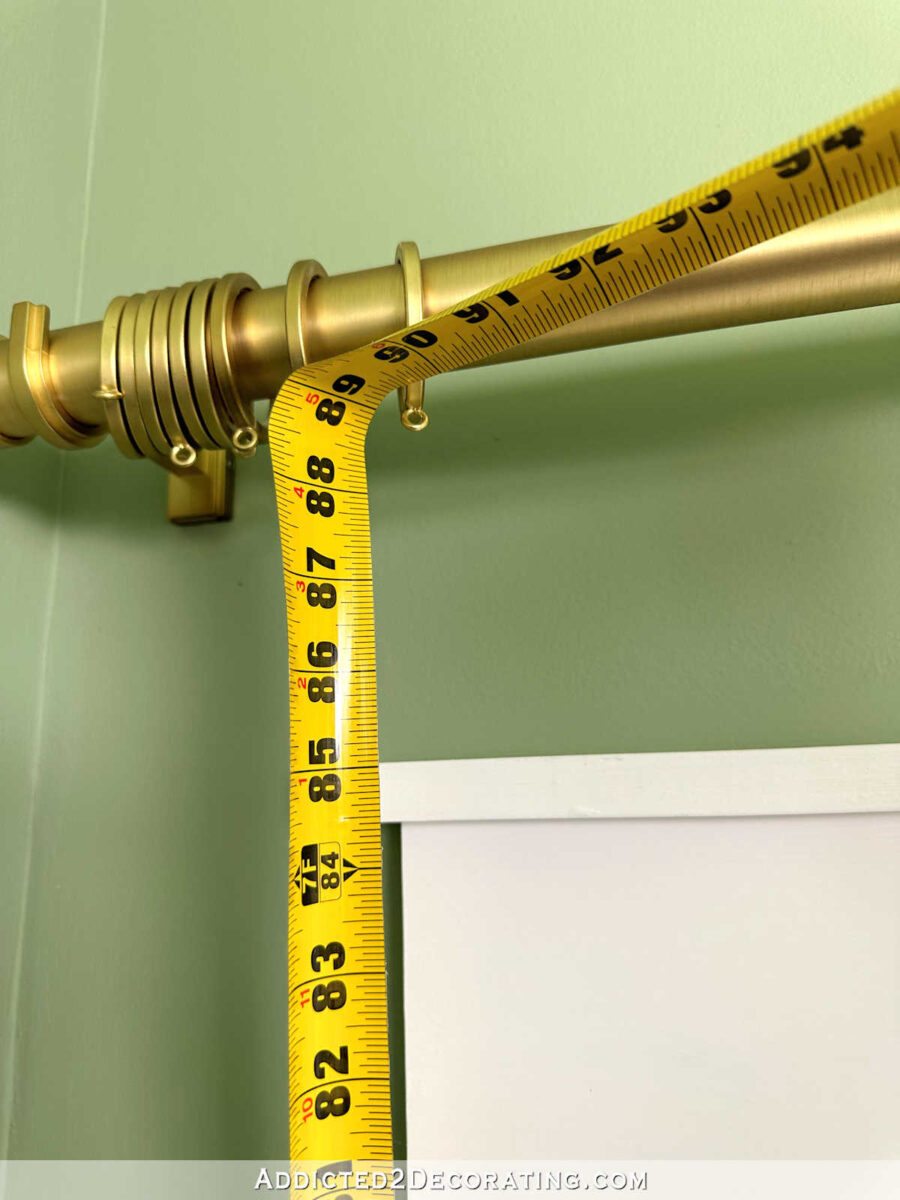
2. Take measurements for curtains.
Once those the rings are added, I can measure for the finished height of my curtain panels. I measure from the floor to right at the top of the little hook ring, which gave me a measurement of 88 7/8 inches. Then I subtract about 1/4 inch to get my finished length for my curtain panels.
3. Prepare curtain fabric.
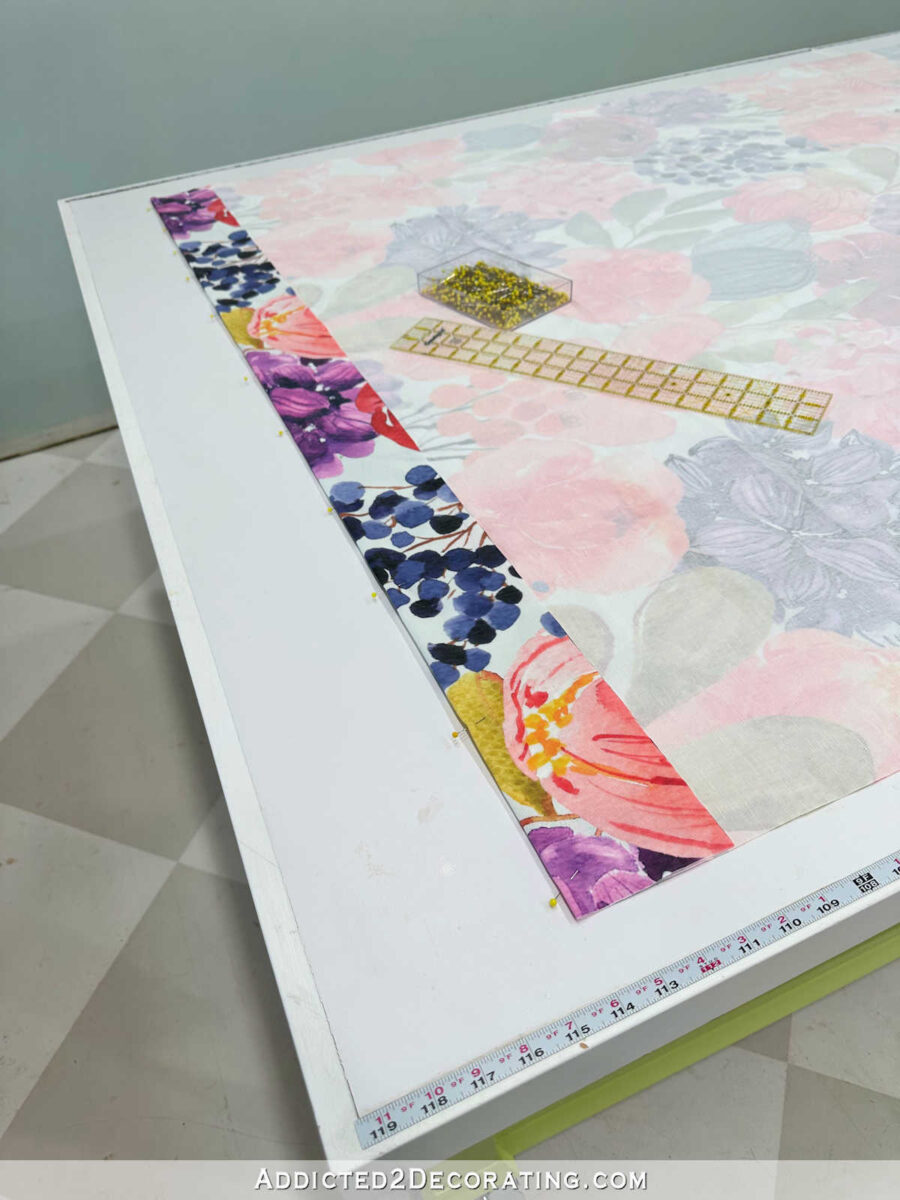
Next, I cut my fabric. For each panel, I allow about three yards of fabric. The first step is to square up the bottom edge of the fabric. I do this by folding the fabric in half lengthwise, and then using a framing square (you can tell I’m a builder at heart 😀 ) to square up the bottom edge of the fabric.
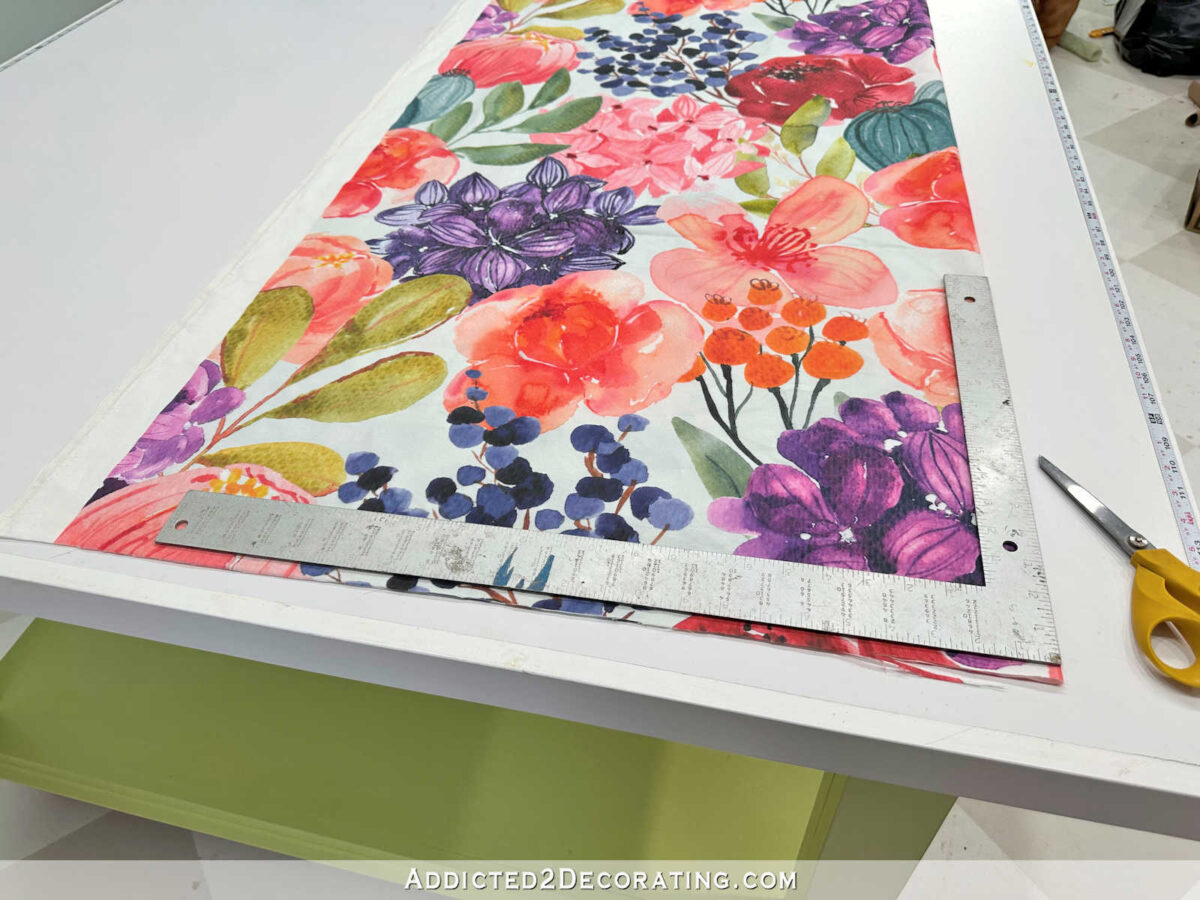
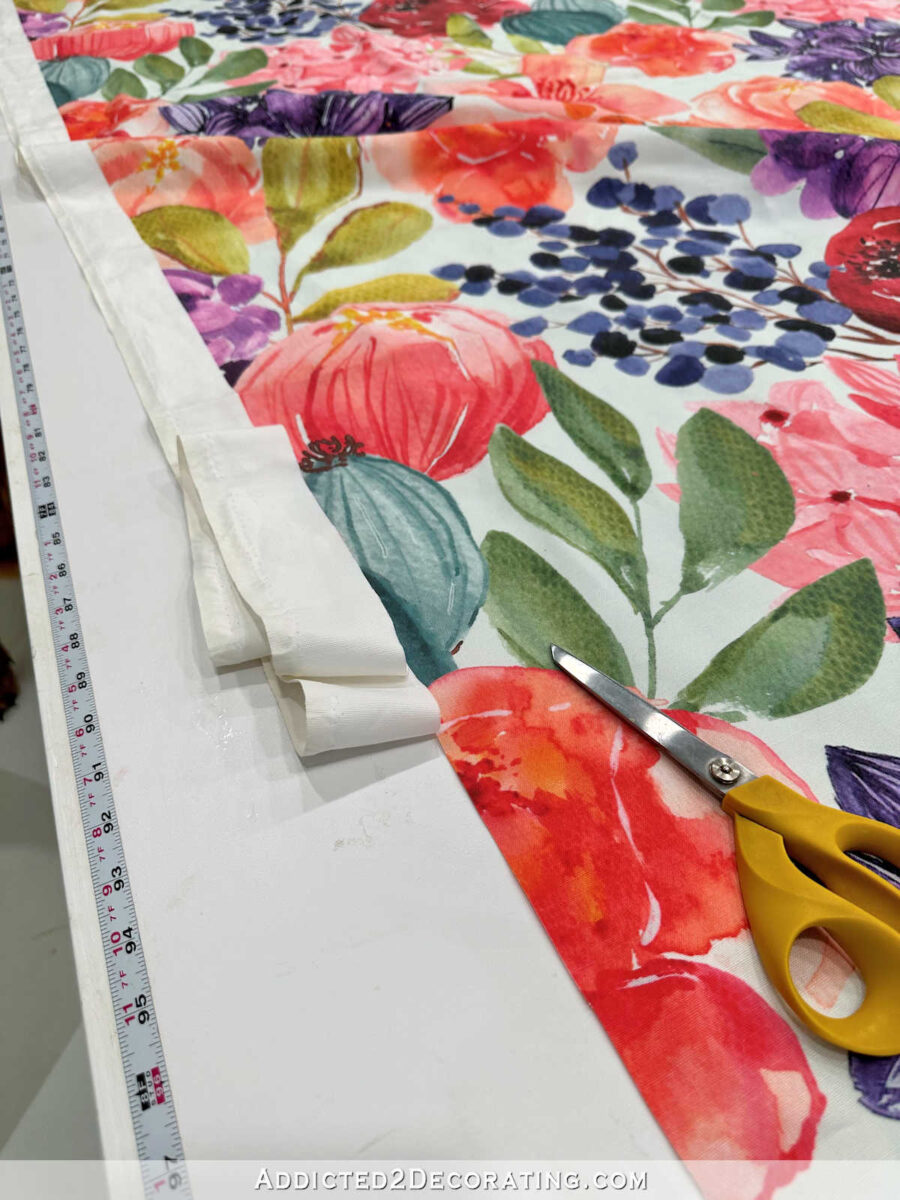
Once the bottom is square, I generally cut off the selvage on both sides of the fabric. For these curtains, I’m using Spoonflower fabric, which is printed with this large white space on both side edges.
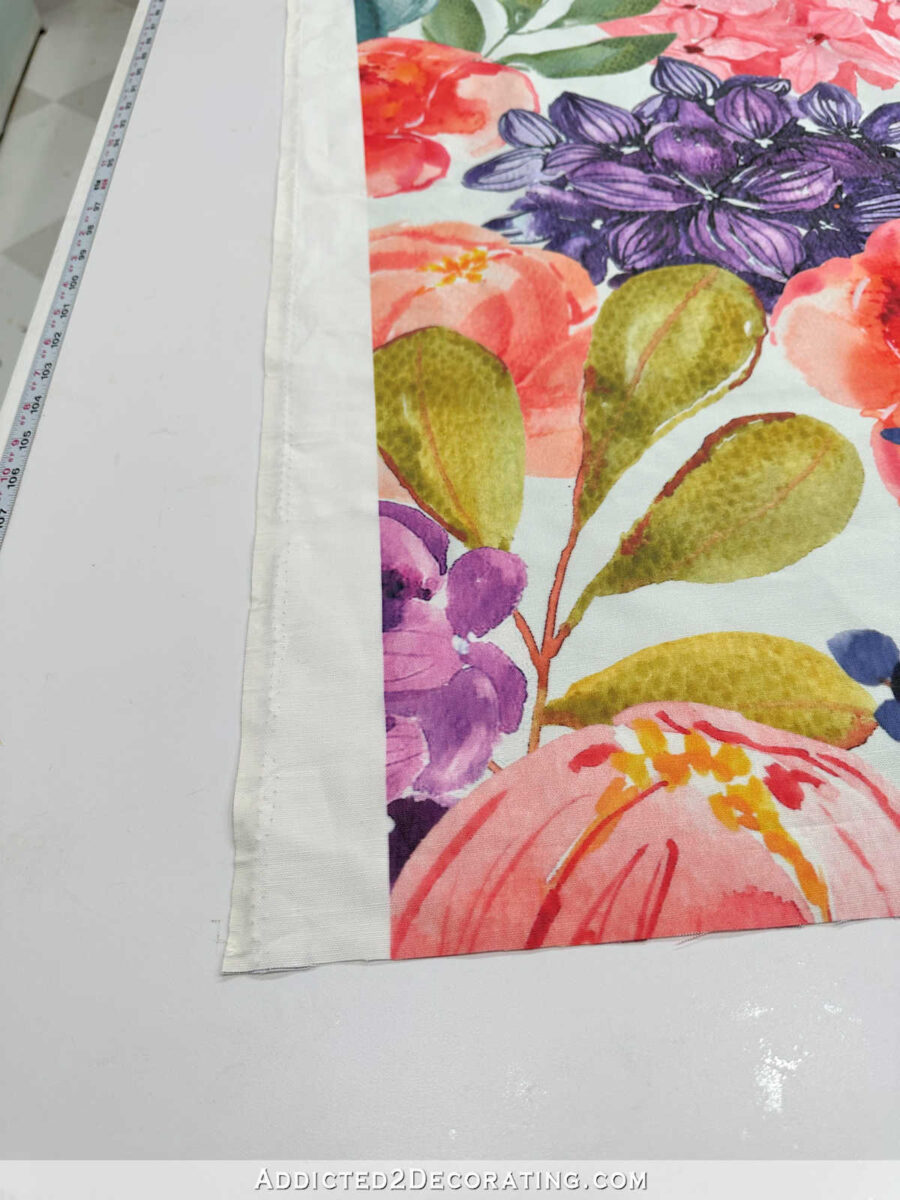
So instead of cutting off just the selvage, I cut off all of the white area right up to the printed design. I repeated that on the other side edge of the fabric.
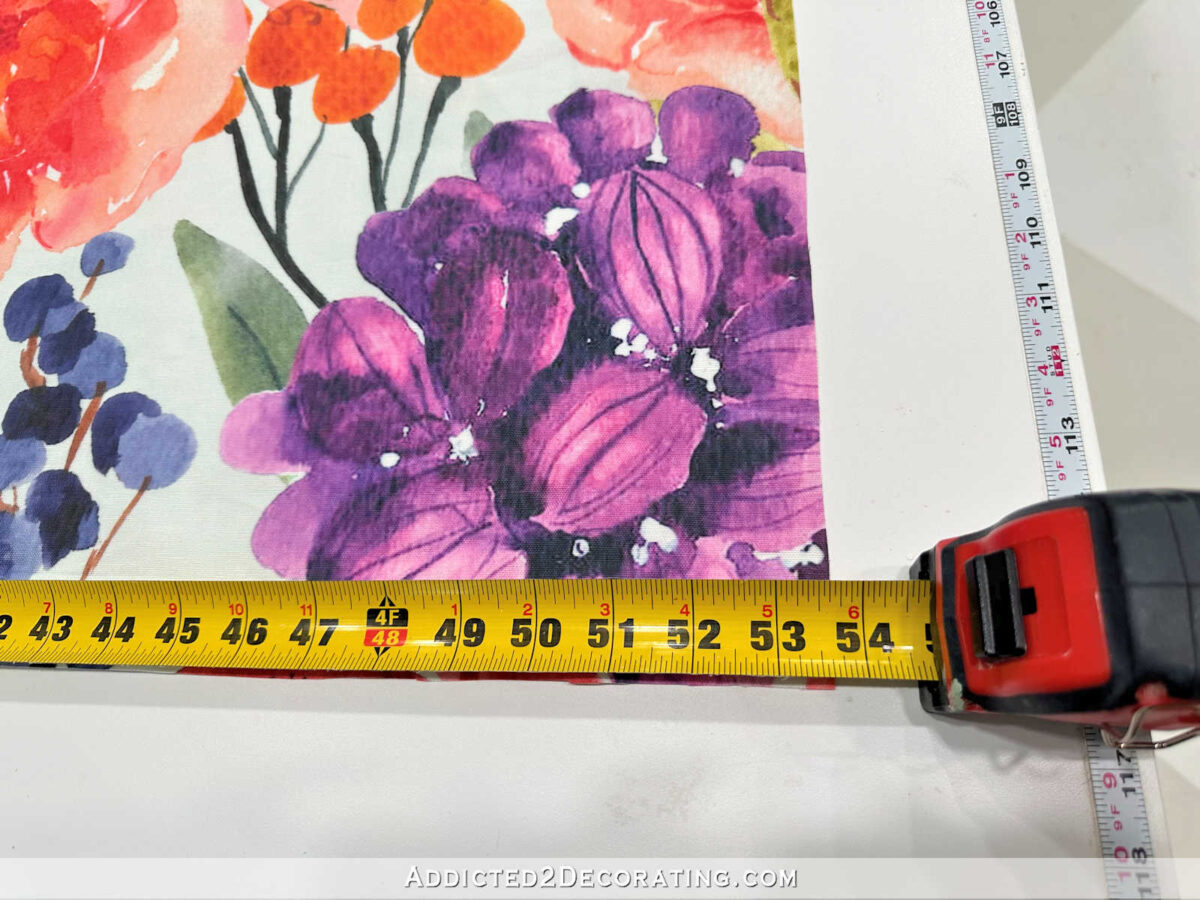
Once the fabric was all trimmed, I measured the (new) width of the fabric and wrote down that number. My fabric was 53 7/8 inches wide after being trimmed.
4. Hem curtain fabric.
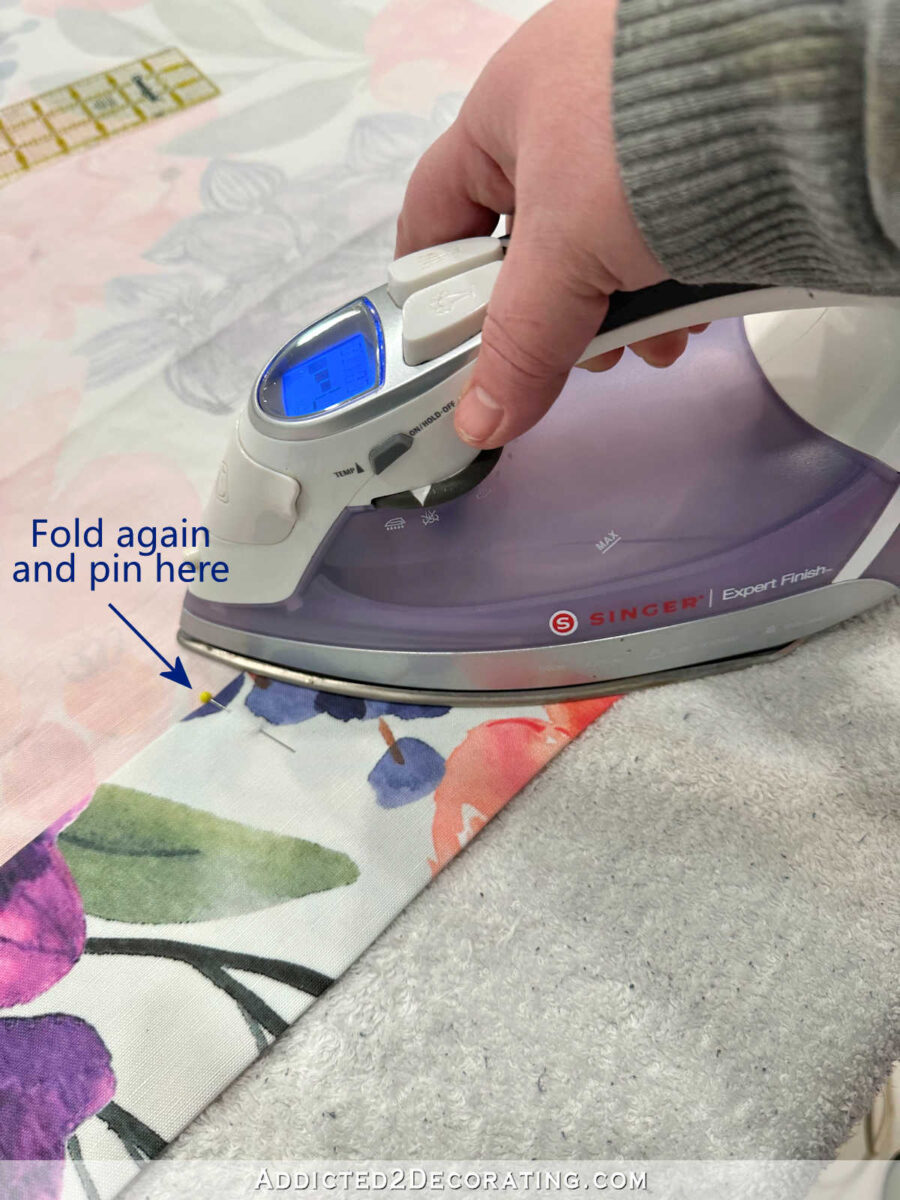
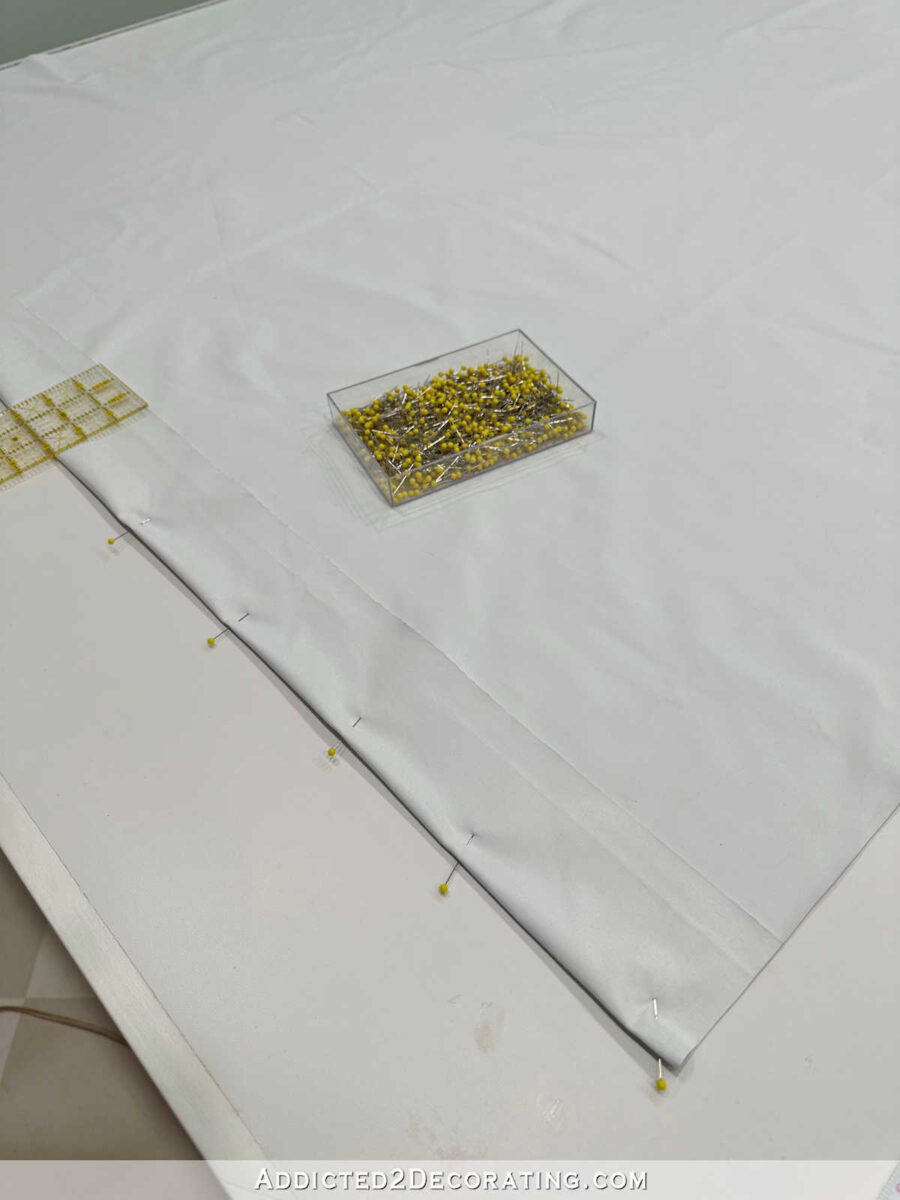
With the fabric all trimmed and squared on the bottom, I was ready to pin in the hem. I did this by turning the fabric up four inches and pinning it into place along the bottom fold.
Here’s a look at it once it was folded and pinned all the way across.
And then I folded it up again another four inches, pinned it into place along the top fold of the hem, and then ironed the folds into place.
In order to sew the hem, I used a blind hem stitch on my sewing machine. First, I folded the four-inch hem back against the face of the fabric so that only the top edge of the folded hem was exposed on the right side, and the back of the fabric was showing on the left. And then I placed that under the foot of the machine.
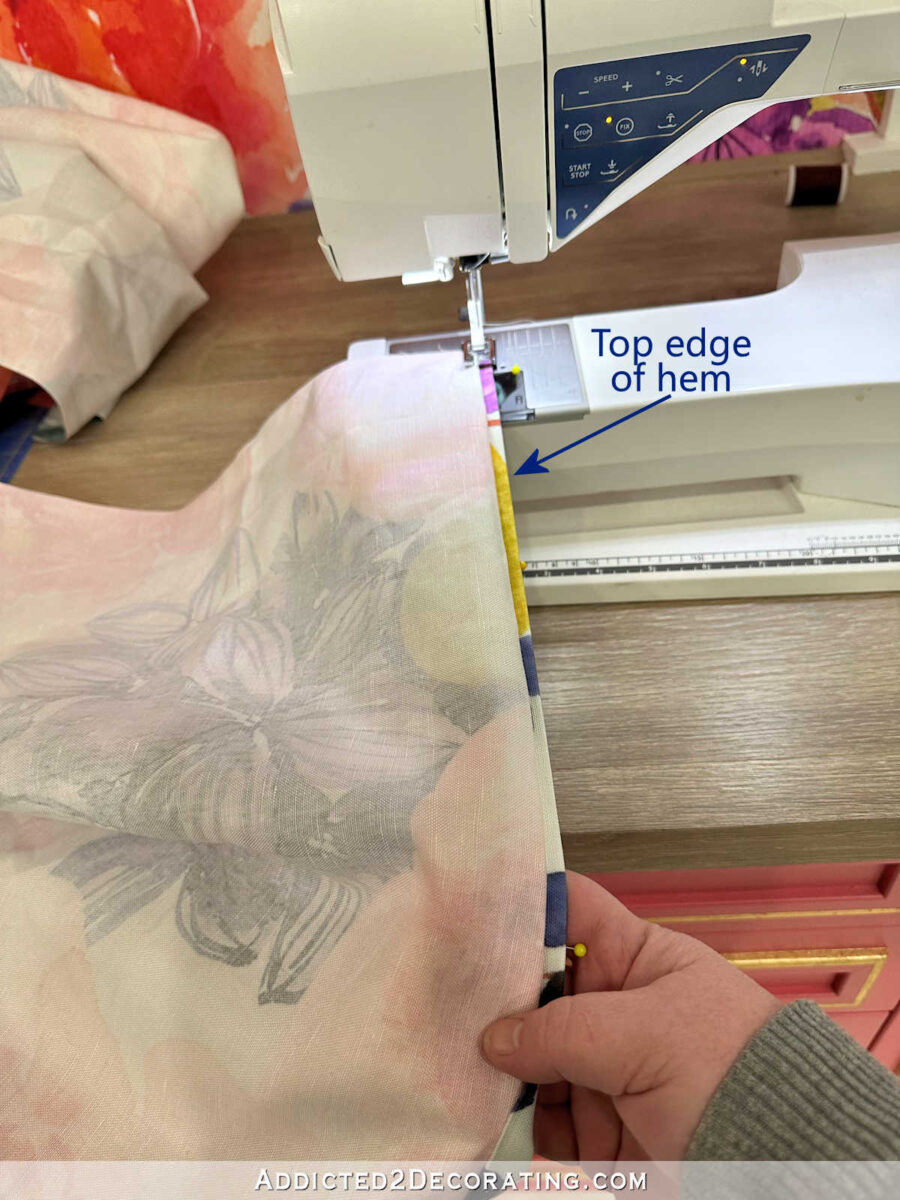
Here is what a blind hem stitch looks like. Most machines have this stitch. Even my $120 Kenmore sewing machine that I started off with 20 years ago had this stitch.

It will sew about four or five stitches on the right, along the top fold of the hem, and then every fifth or sixth stitch, it will reach over to the left and grab just the tiniest bit of that fabric on the left.
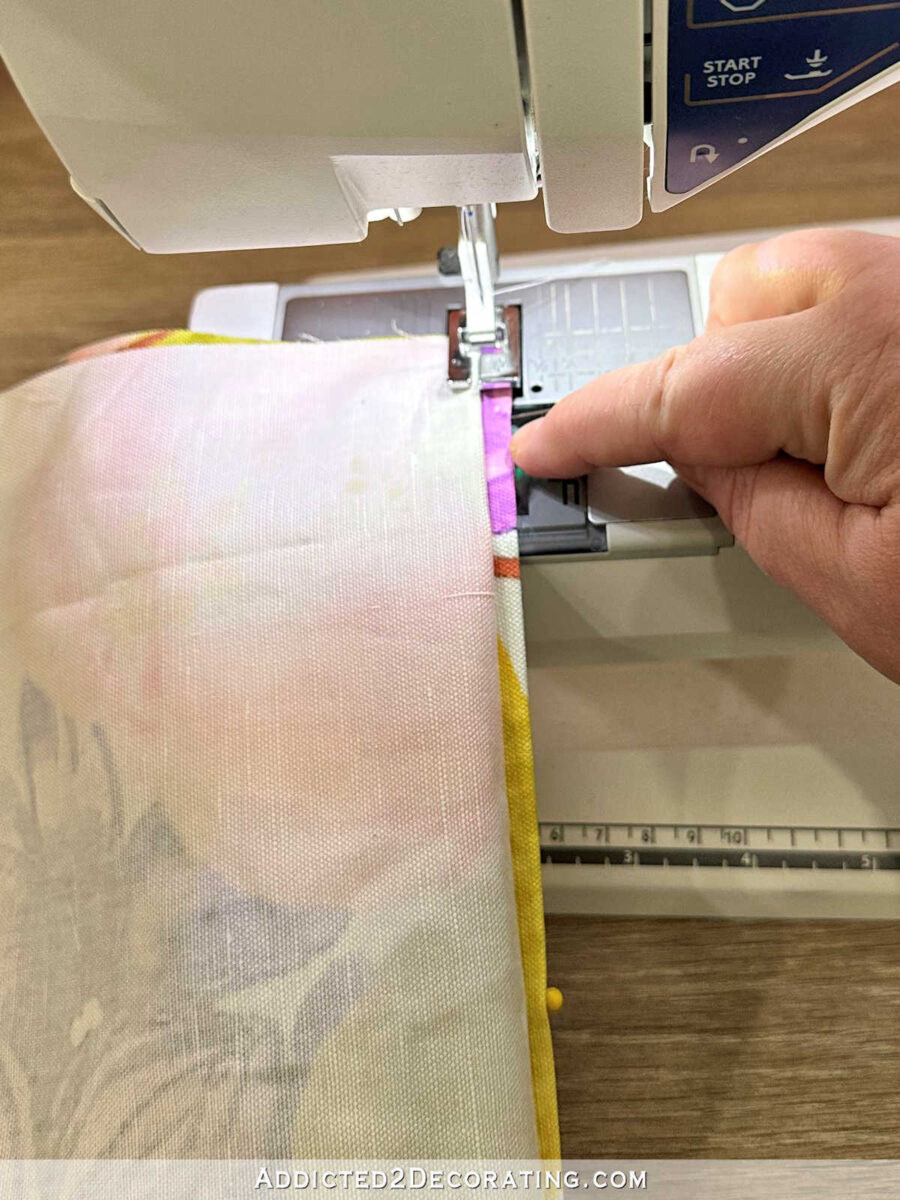
Here’s a closeup of what that stitch looks like with the hem still folded back against the front of the fabric.
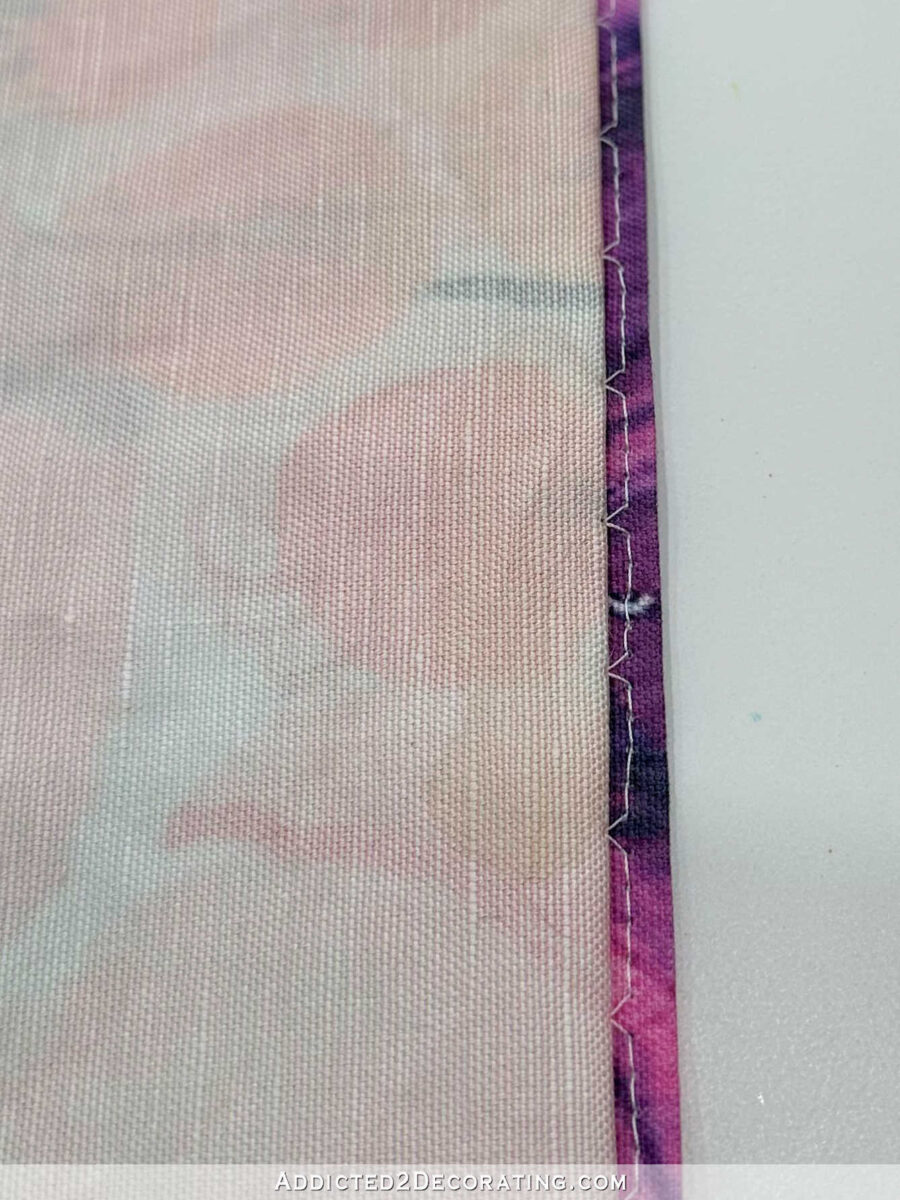
And then when the hem is unfolded, it looks like this…
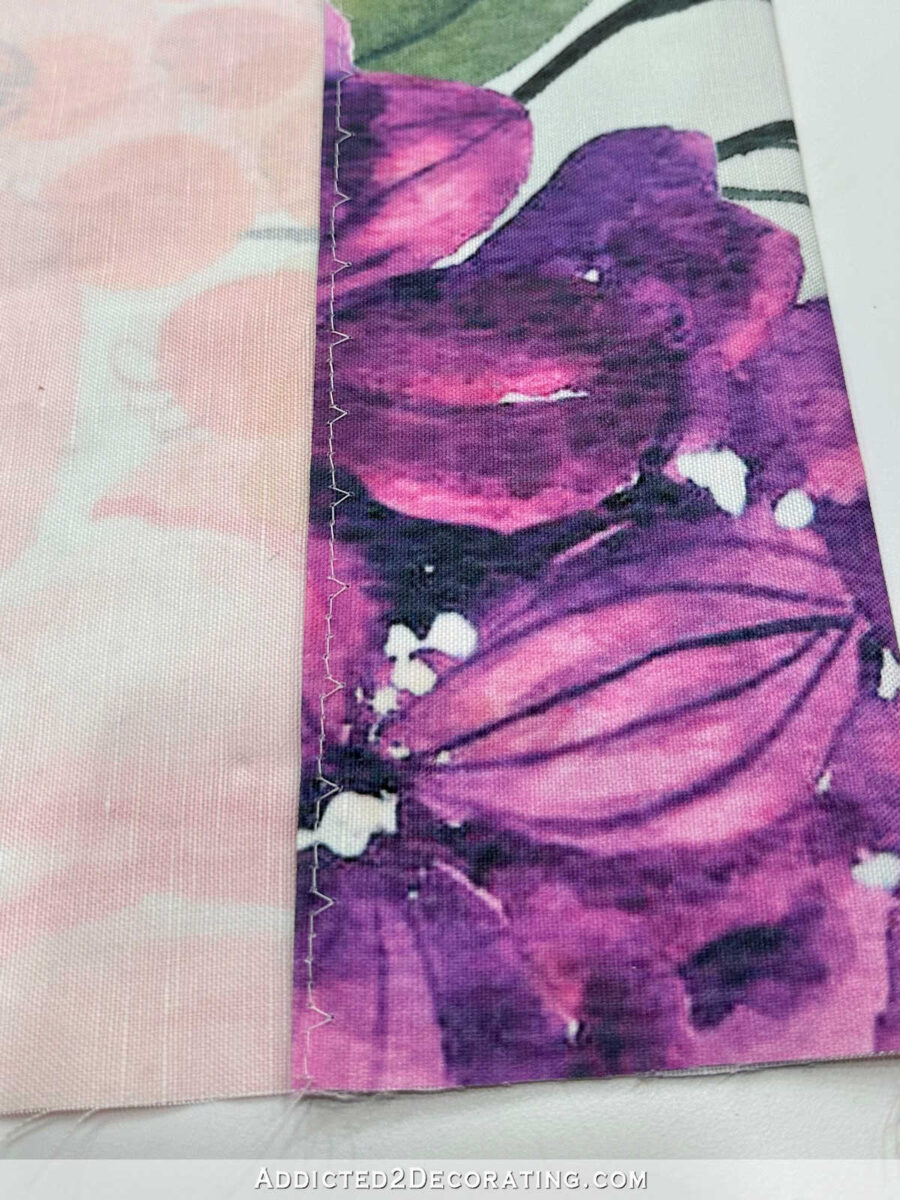
And when the fabric is turned over with the right side of the fabric facing up, you can’t even see those stitches, hence the name “blind hem stitch.”
Here’s an even closer look. Can you see the stitches? In person, if you’re really looking for them, you can see them. But no casual viewer of these curtains is ever going to notice those stitches.
5. Prepare and hem drapery lining.
Putting that fabric aside for a while, I was ready to prepare the lining for the curtain panel. Just as I did with the fabric panel, I started by squaring up the bottom edge, and then pinning a double three-inch fold along the bottom edge. I always do a double four-inch fold for my face fabric hem, and a double three-inch fold for the lining hem.
Once that pinned in and ironed, I sewed that hem into place with a standard top stitch. You can do a blind hem stitch on the lining as well, but I never have. I don’t see the point in it, and since I’m making these for me, I’m fine with a topstitch. If I were working in a professional drapery workroom and making them for a paying customer, I might choose otherwise.
One of the reasons I don’t bother is because I always use blackout lining, and there’s just really no hiding stitches on blackout lining. I love the blackout feature, but I hate that it shows every single stitch, and even every single place where pins are added. And wrinkles are just about impossible to remove from blackout lining. So a topstitch is fine for me.

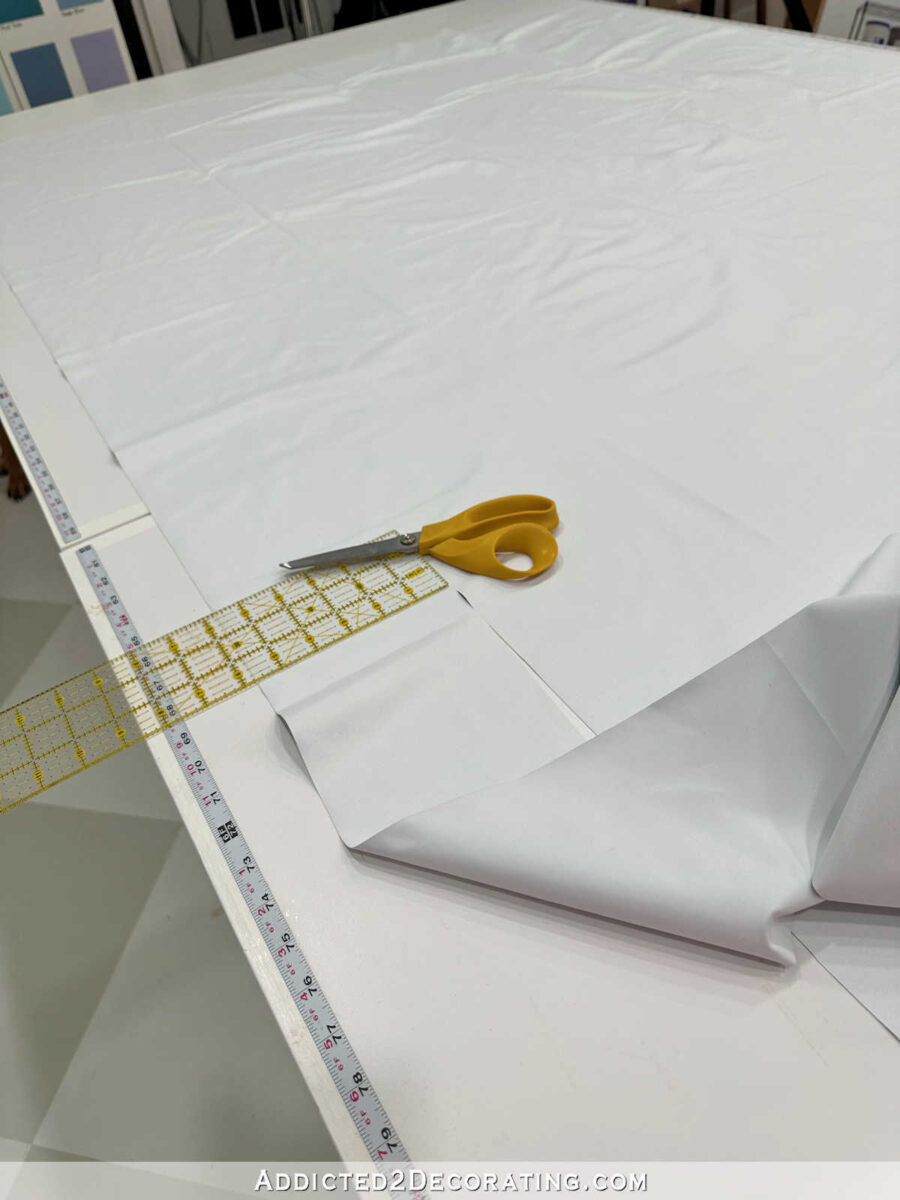
And the last thing to do to prepare the lining is to cut it to the proper width. I had already measured the cut width of my face fabric, which was 53 7/8 inches. To figure the cut width that I needed for my lining, I just subtracted 4 inches from that number. So I measured and cut my lining to 48 7/8 inches wide. Since blackout lining doesn’t have a selvage, I only needed to make one cut along one side edge to get the proper width. If I were using a thinner fabric lining with selvages, I would have cut both side edges.
6. Attach lining to the curtain fabric.
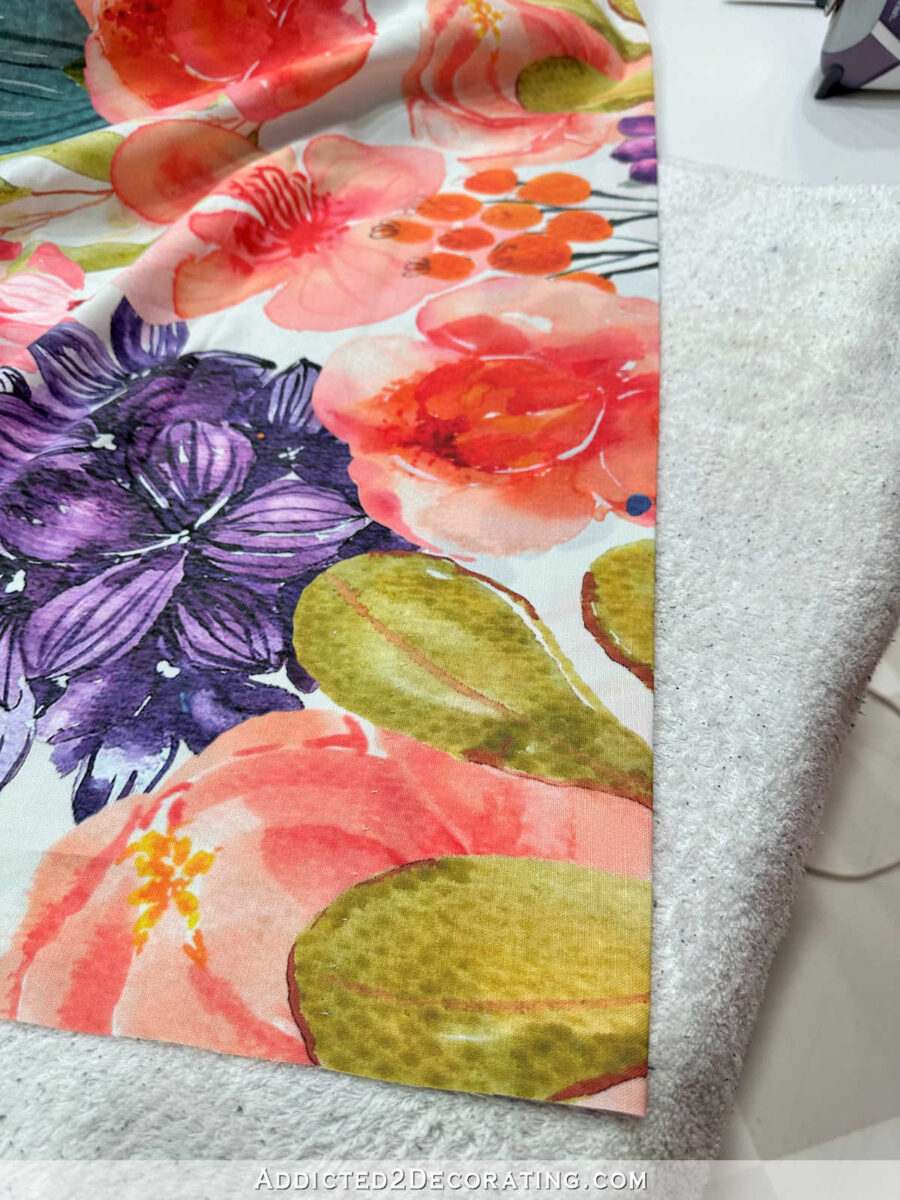
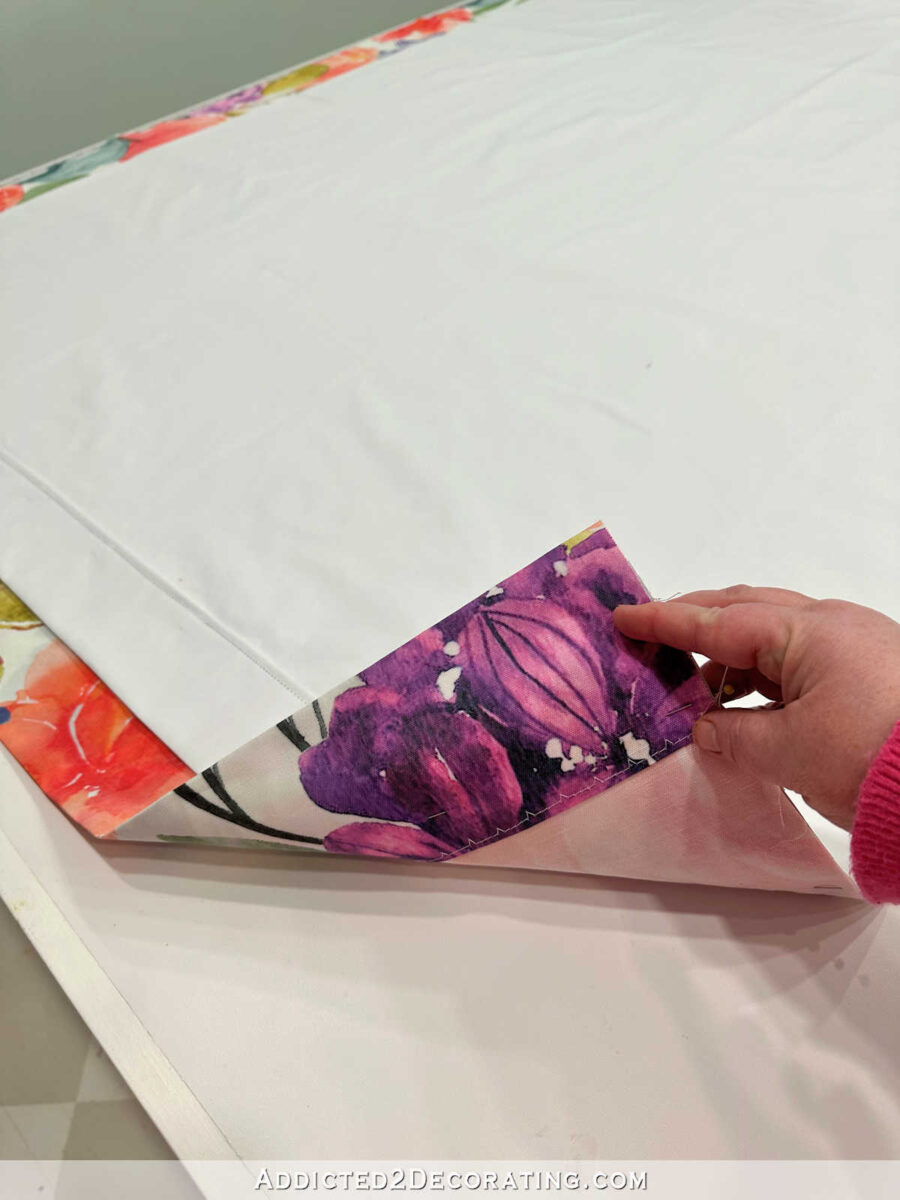
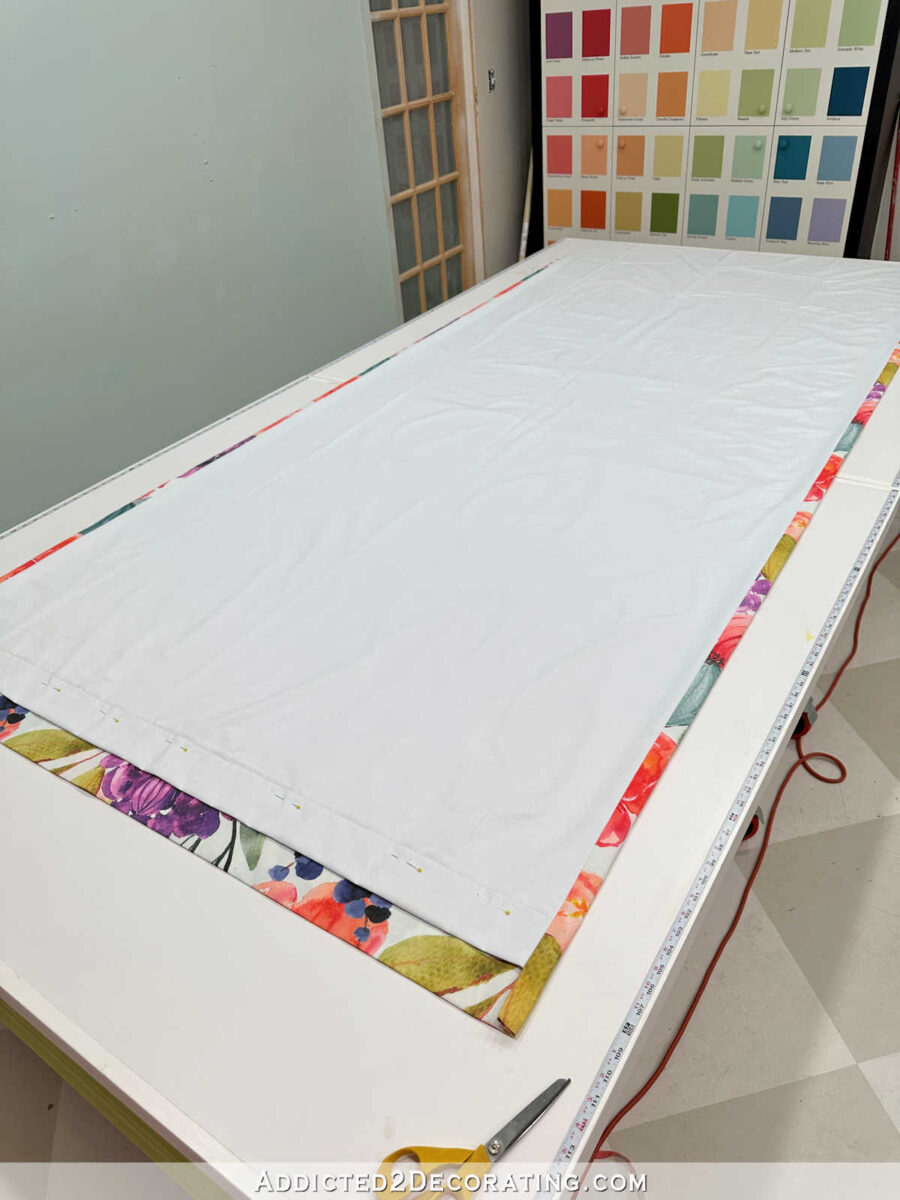
Now that I had the face fabric and the lining prepped, I was ready to join them together. I did this by placing the face fabric, right side up, on my work table.

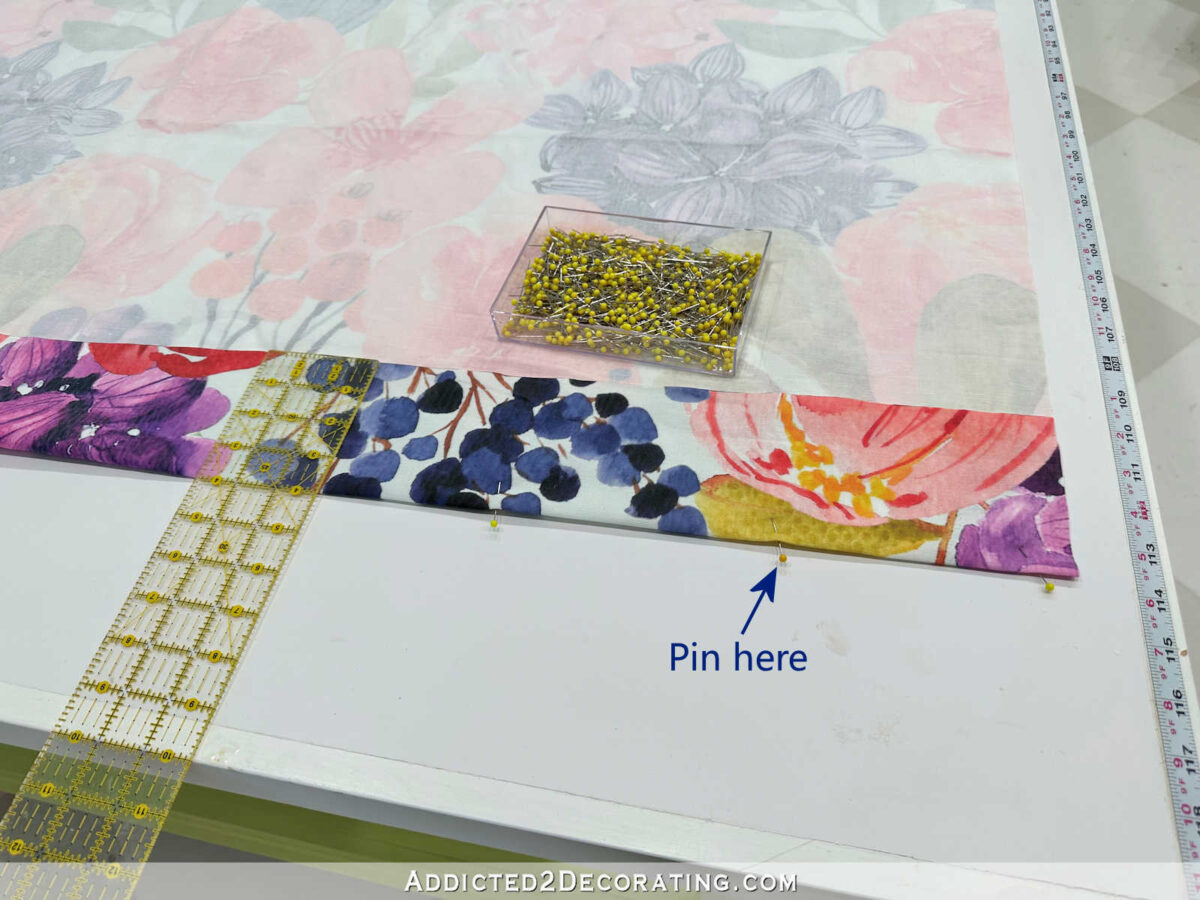
And then I placed the lining, right side down, on top of the fabric. Measuring from the bottom edge of the hemmed fabric, I measured up 2 1/2 inches for the placement of the bottom edge of the hemmed lining, and began pinning the lining and fabric together along the side edge.
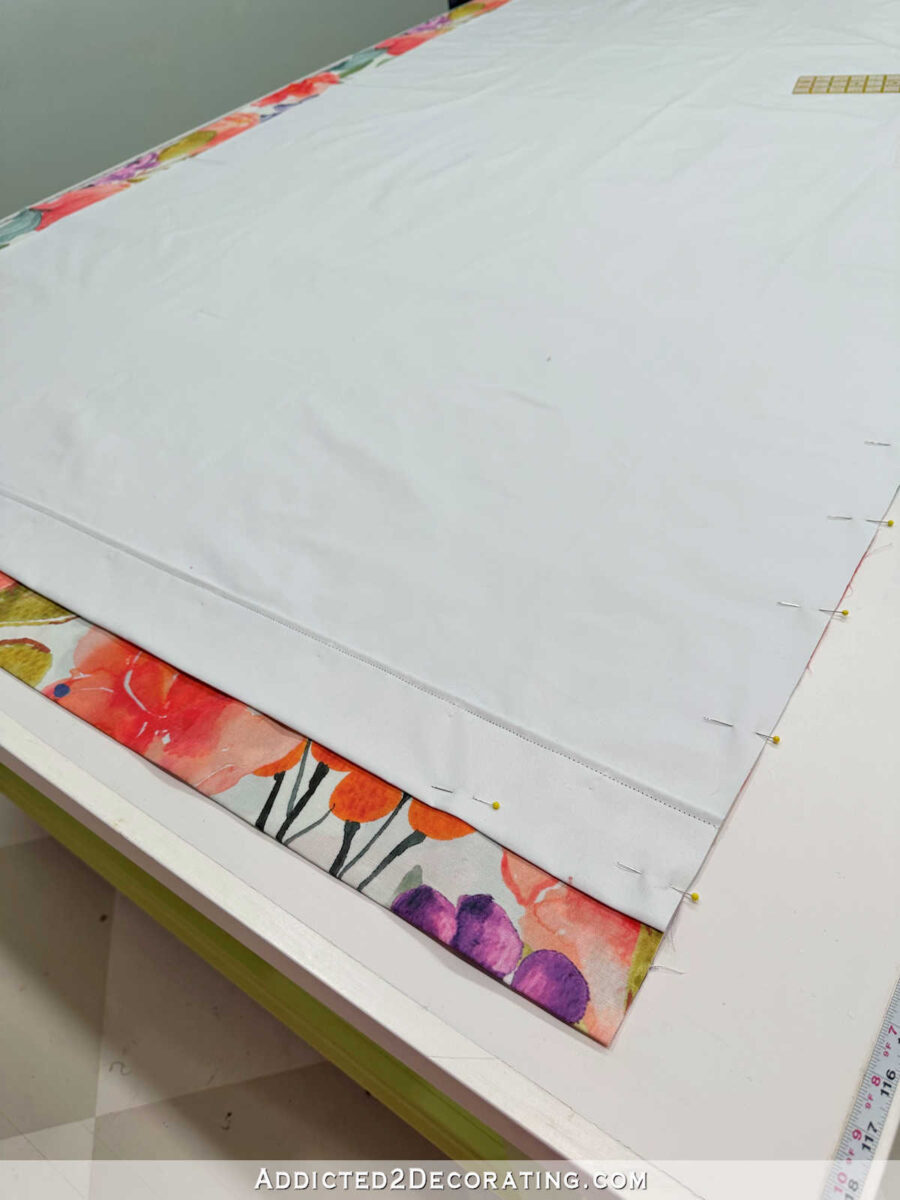
So again, the right (face) side of the fabric and the right (face) side of the lining are facing each other, and the bottom hemmed edge of the face fabric extends 2 1/2 inches below the bottom hemmed edge of the lining.
And I pinned those together all the way up the side of the fabric.
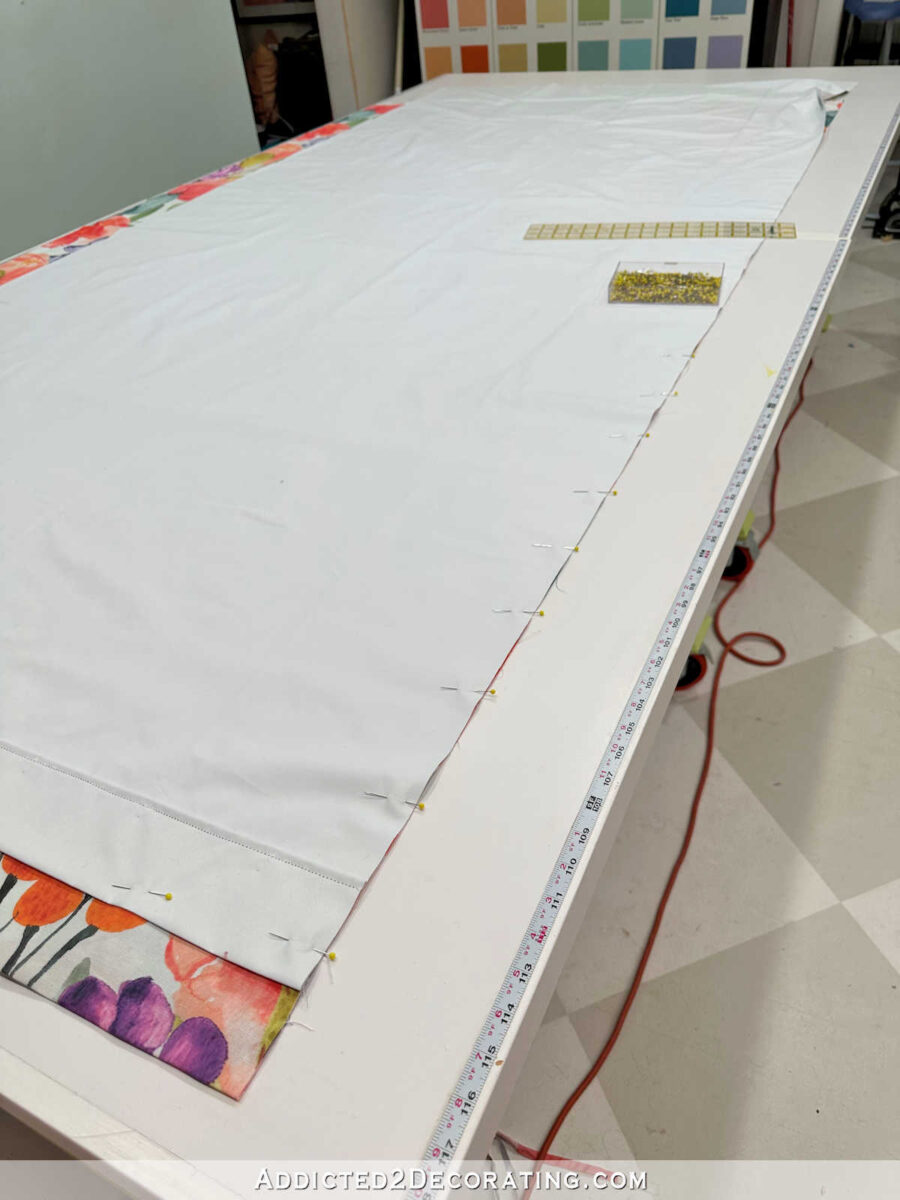
Next, I pinned the other side together. Since the lining was cut four inches narrower than the face fabric, it initially looked like this with the pieces lying flat on each other.
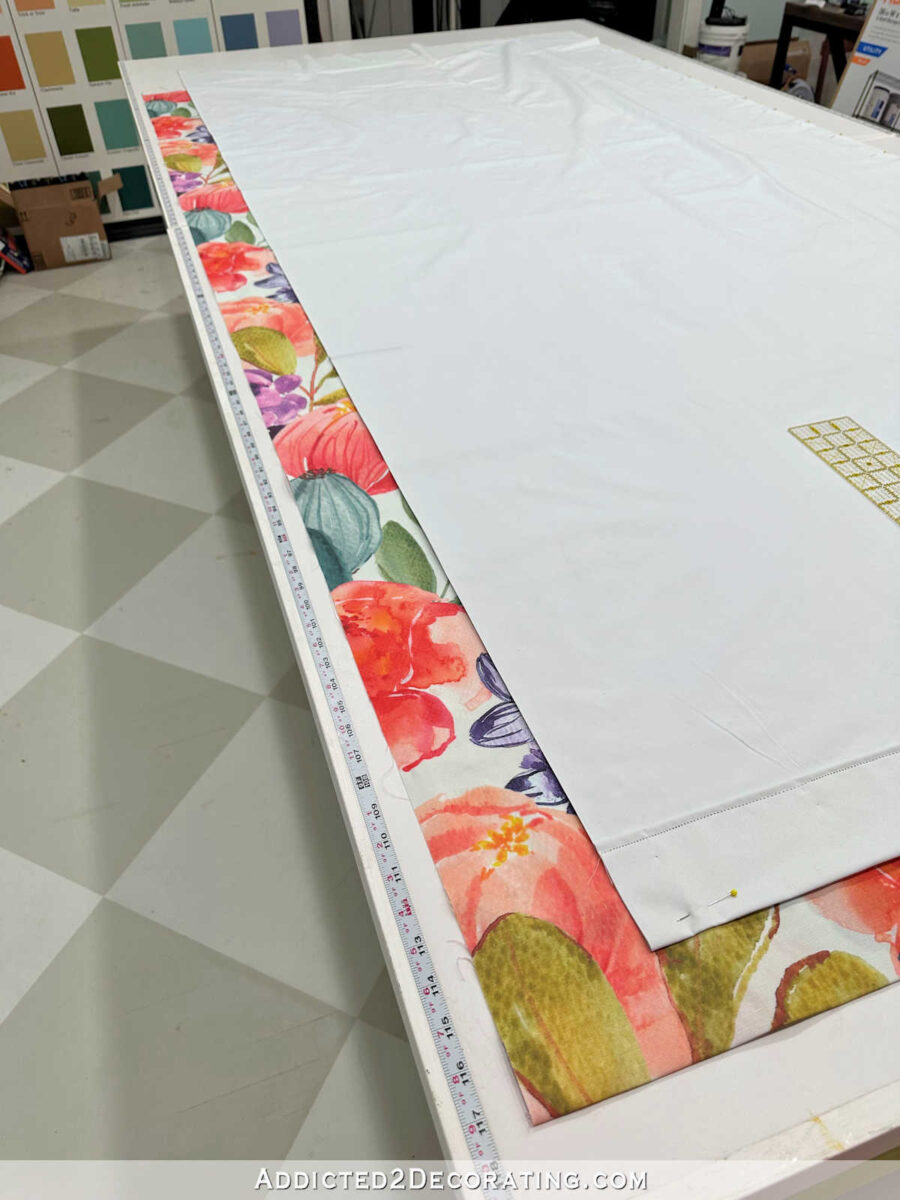
So I had to pull the lining over so that the edge of the lining met the edge of the face fabric. I made sure that the bottom hemmed edge of the lining was 2 1/2 inches up from the bottom hemmed edge of the face fabric, pinned that into place, and then worked my way up the side edge, pinning the to pieces together all the way up.
Next, I sewed the pieces together along both side edges, sewing my straight stitch one inch from the edge. That’s a lot wider than a standard 5/8 inch that’s generally used when sewing most items (like clothing or pillows), but you’ll see why later. I repeated that on the other side.

Just a note: When sewing the lining and face fabric together, I sew both sides going in the same direction. In other words, if I start sewing at the hems and work my way to the top of the drapery panel on one side, I make sure to start at the hem and work my way to the top on the other side as well. That’s just a good practice and will save you a headache if you ever happen to be working with a fabric that shifts or crawls a little as it’s sewn. If it’s going to crawl, at least both sides will be crawling in the same direction.
With the sides sewn together, I always steam iron those stitches into place to smooth out the stitches as perfectly as possible.

Then I separate the lining and face fabric, and steam iron the seam so that the face fabric is folded back on itself, and the lining is straight (i.e., not folded).

And finally, I turn the panel right side out, and steam iron that seam once again from this side. Again, I make sure I’m ironing it so that the fabric is folded against itself, and the lining is straight.

With everything ironed flat, I’m ready to place the curtain panel back on my work table and get it all straightened out and flattened. I start at the bottom hemmed edges, and pin the two layers together all the way across.
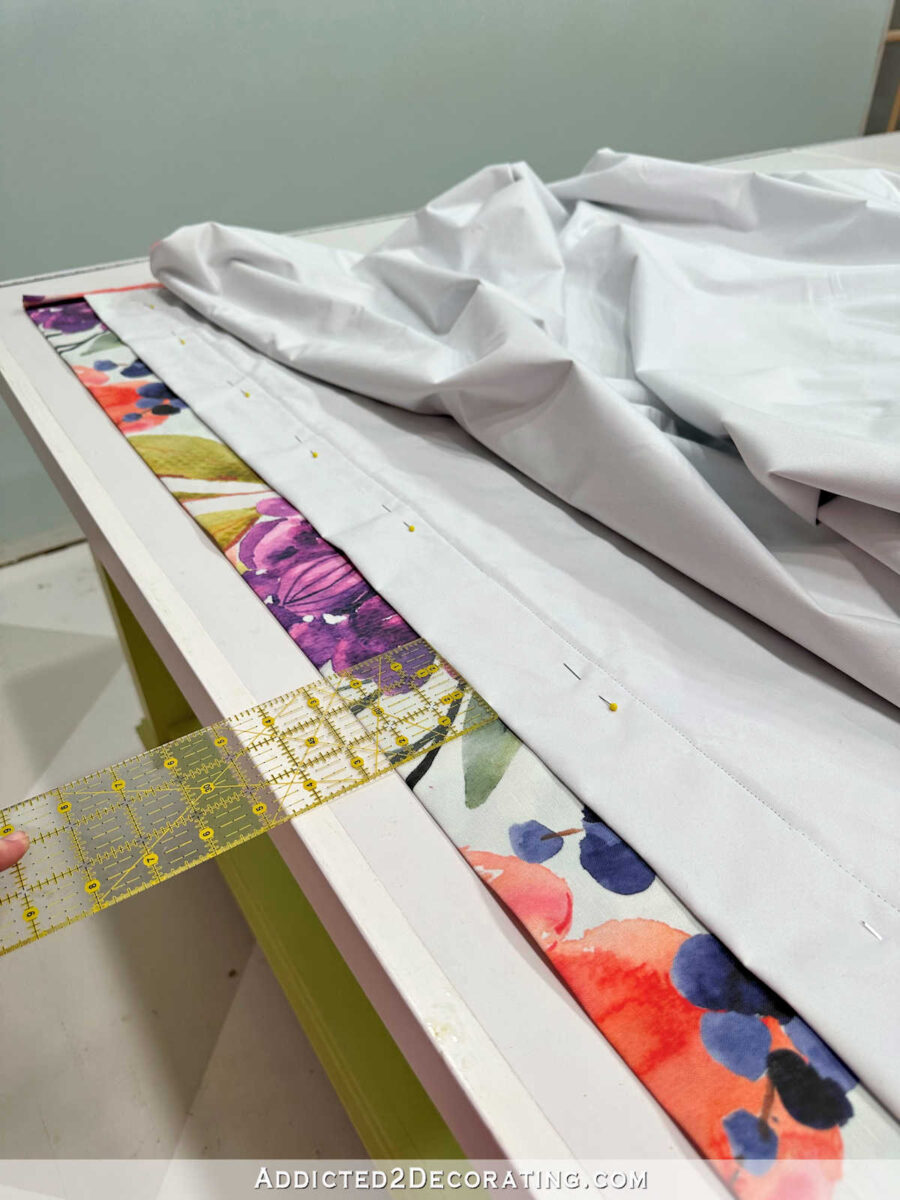
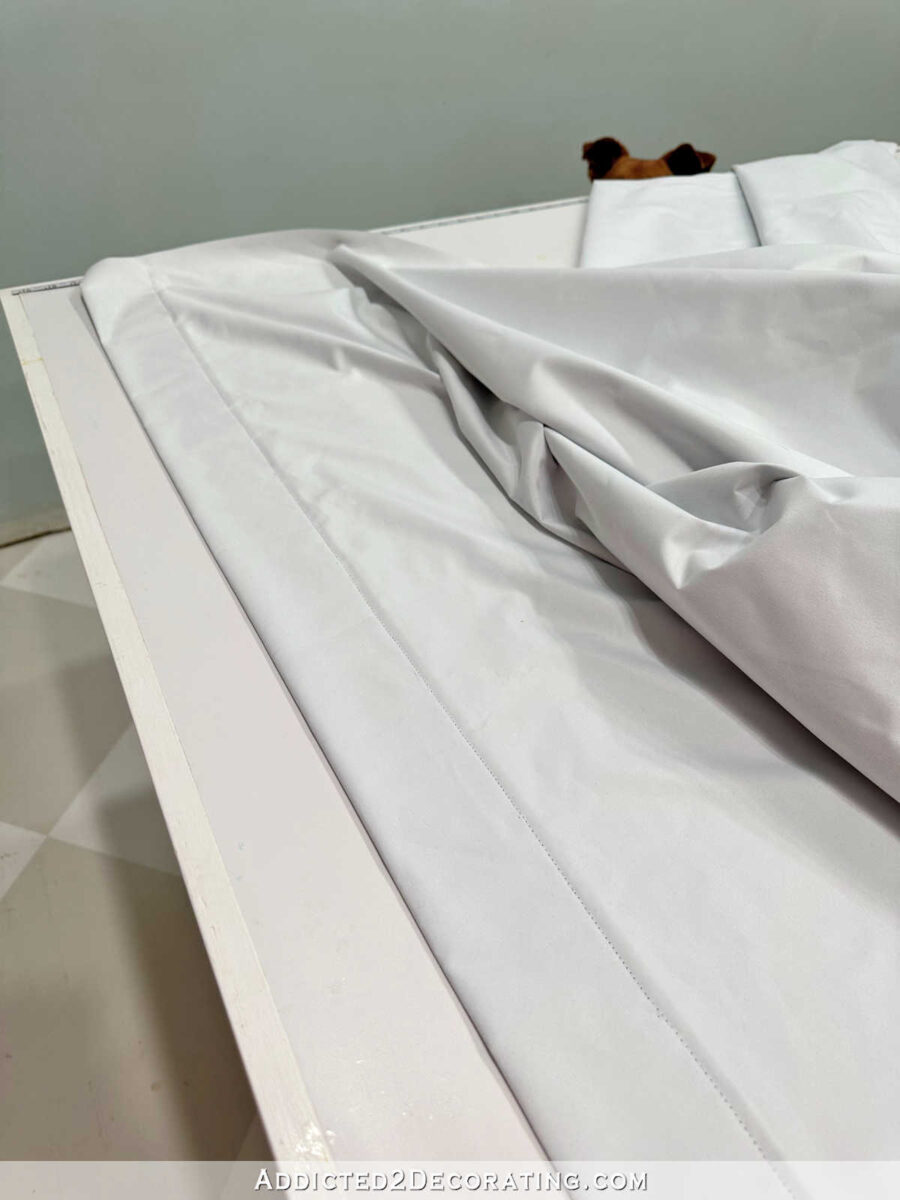
And then flatten and smooth the layers until they look like this, with one inch of the face fabric showing along the back of each side edge.
Once everything is completely smooth and flat, I give those edges a good steam iron one more time to make sure those folds in the face fabric are securely in place, and I have a clean, sharp ironed-in crease along the edge of the drapery panel.
And that’s as far as I’ll get for today. Tomorrow, I’ll show you how to finish the panel with the pleated header at the top, and all of the finishing hand stitching that I do for a really clean, finished look. So stay tuned for that!
Update: This is a two-post tutorial. Click here to see Part 2 of the tutorial.

Addicted 2 Decorating is where I share my DIY and decorating journey as I remodel and decorate the 1948 fixer upper that my husband, Matt, and I bought in 2013. Matt has M.S. and is unable to do physical work, so I do the majority of the work on the house by myself. You can learn more about me here.
This is really helpful and clear. You are motivating me to get moving on curtains for the new home. Thank you! A word of warning though: I have found in the past that some blackout linings contain so much plastic in the weave that steaming high enough for the main fabric melts and stretches the lining a bit so that it never hangs evenly. Suggest a cloth between the iron plate and the blackout lining if ironing the lining side. Personally I will work with a non blackout lining this time.
Wow! I’ve never seen a more complete tutorial! Great job!
Thank you for this tutorial! I would love to see a video of your process too. I am a novice sewer, and the addition of a video would help me better understand the process. Your panels will be stunning, and I can’t wait to see the finished product!
FYI: The drywall T square is an awesome tool for sewing also….
I had to buy 2 yrs ago. Hubby was stingy about lending it and I was picky about not dropping mine or getting nicks.
Kristi, thank you so much for always going into such detail to show how to do something, and do it right. You are a marvel and a genius. You are making me want to get my workroom back together again and get busy.
Just FYI, this post has a couple ads for an adult products store. Not sure if that’s really your target audience!! And I am 100% sure it’s not my algorithm. 😂🫣
How do you get ads? I’ve never gotten ads on this page and I’ve been reading her blogs for over 10 years. That’s wild.
I’m not sure. I read it on my phone and there’s tons of ads, sometimes even covering the content. But I don’t mind because I like Kristi, and I know this is her and Matt’s livelihood.
Nice to see the really correct way to do these. I have made simple curtains all my life, but I can see I never really did it professionally like you do. I’m enjoying watching the process. Thanks! Makes me feel like sewing!
PS) I just noticed the comment about the ads. Strange, I only see a white box that says “Advertisement”, but nothing is there. I don’t mind that though!
Thank you for this information. I am going to use it to make my curtains for my sewing room as well.
Great basic curtain panel. And BTW, re: “Can you see the stitches? In person, if you’re really looking for them, you can see them. But no casual viewer of these curtains is ever going to notice those stitches.”
I would see them because I trip over shadows and would mostly likely be laying on the floor with my nose in the fabric!
Do we get the Pinch Pleat tutorial next? That’s my most difficult part without using the sew-in tape to put the hangers in for the rings.
Thank you for such a detailed tutorial. It (and the second part) will definitely be followed when I make my drapes later this year!
Kristi, I wish I could do this.
I love that you do this, both for yourself and others! Back when I worked (I quit to become a full-time mom a year ago), every time I did anything new I wrote a tutorial with screenshots as I did it, so that any time it came up again, there was a reference document. This came in handy soooo many times, and was especially handy when I quit! It’s so awesome to share knowledge this way and record it for future use when you need to do it again!
Kristi, do you measure the distance from the floor to the rings at several points of the curtain rod? Or is you floor horizontal enough, so you don’t need to do this?
I’ll just do one measurement for each panel, so one measurement for each end of the rod. It’ll never be perfect in our house because (1) none of our floors are perfectly level…ever, and (2) because of the soil in our area, our pier-and-beam house is constantly shifting and moving. So even if I were to make them so that each panel is perfectly 1/8 inch from the floor all the way across both panels for now, that would only last until spring, and then it’ll be different again in the summer. This house has definitely tested me as far as my perfectionism goes. Learning to be okay with unlevel floors, doors that don’t close properly for part of each year, etc., has stretched me. 😀 But if your house isn’t constantly shifting like mine, I do recommend doing two or maybe three measurements across the area where one panel will hang, and then use the shortest measurement for that panel.
You’re amazing. I fully understand the 1-inch side seam now. You do beautiful work.
Thanks for this terrific tutorial. It’s inspiring to see it done correctly. Now I’m ready to tackle lined draperyt panels! Looking forward to part II.
I think it’s funny that you use a steel ruler instead of the usual seamstress’s tape measure. Much smarter, more accurate.
FYI I see lots of small ads.
Love the fabric. Great job!
Getting ready to make some myself.
I also love the little ears peeking!!!
Take good care and keep on decorating
Woohoo! This perfect timing for this post. I am making new curtains for my bedroom and your tutorial is spot on. You really have a knack for explaining the details. I wish I had your work tables, but the floor works Ok for now. Thank you and looking forward to part two!
Great instructions and illustrations!
I’m curious as to why the blackout lining? I thought there was a roof over that door that keeps the sun from hitting it… Am I missing something?
Great tutorial, by the way.
Great tutorial. Thank you!!!
You are so talented!
Love following your blog!! Everything you do is amazing and inspiring! I’m wanting to buy a sewing machine that has a built in walking foot, nothing expensive, nothing fancy. Could you please recommend one? Thank you!
I LOVE the detail you go into when explaining step by step how the process works. Thank you!!! I feel like i just took a class and feel confident I could try this.
Glad you made a video. You make this look easy so maybe I can make the curtains I have had material for 9 years. I’m never one to rush into anything!
I really appreciate your instructions. I have made a complete set of drapes for my living room following this plan. I am now working on a new set.
I forgot to ask this, how do you keep the drape leader stiff, mine seem to droop.